A test-kitchen master method for enriched spiral dough that stays pillowy for two days, with exact hydration, butter temperature, and internal doneness numbers instead of guesswork.
Mix an enriched dough of 500 g bread flour, 240 g whole milk at 100–110°F, one egg, 50 g sugar, 7 g instant yeast and 6 g salt, then work in 85 g butter only after the gluten has developed. Bulk ferment 75–90 minutes at 75°F until doubled, roll into a 16 × 12-inch rectangle, spread 85 g butter beaten with 150 g brown sugar and 15 g cinnamon, roll tight, cut 12 pieces, proof 45–60 minutes (or retard overnight in the fridge), and bake at 350°F for 25–30 minutes until the center hits 190–195°F. Frost while the rolls are still warm.
- What a Cinnamon Roll Actually Is (and Where It Came From)
- Ingredient Selection and the Science of a Soft Crumb
- Prep Plan and Equipment Overview
- The Step-by-Step Master Method
- Key Ratios, Temperatures and Timing
- Common Mistakes and Troubleshooting
- Frosting, Pairing and Storage
- Frequently Asked Questions
What a Cinnamon Roll Actually Is (and Where It Came From)
A cinnamon roll is three separate recipes stacked in one bite: an enriched yeasted dough, a fat-and-sugar filling that partially melts into the spiral, and a glaze applied at a specific temperature window. Get the dough wrong and no amount of frosting rescues it — the crumb is dry and bready by the second hour. Get the filling wrong and it either oozes out onto the pan floor or stays gritty and raw-tasting in the center of the coil.
The pastry most Americans picture — a palm-sized spiral under a thick cap of cream cheese icing — is a mid-century American descendant of the Swedish kanelbulle. Swedish bakers began selling the spiral widely in the 1920s, once butter, sugar and eggs became affordable again after the rationing years of the First World War. The Swedish version carries cardamom in the dough and a scattering of pearl sugar rather than frosting, and it has its own national holiday, Kanelbullens dag, on 4 October.[5]
Swedish: lean-ish enriched dough with ground cardamom (about 1 tsp per 500 g flour), a thin butter-sugar-cinnamon smear, a looser coil so the layers stay distinct, baked to a deep amber and topped with crunchy pearl sugar.
American: richer dough with more butter and egg, a thicker paste filling using brown sugar for molasses depth, a tighter roll for gooey centers, and a tangy cream cheese or powdered-sugar glaze applied warm so it melts into the crevices.
Neither is “correct.” The technique below gives you the tighter American spiral, but it includes a cardamom option and a Swedish-style glaze if you want to go the other direction.
Structurally, you are building a laminated spiral by hand. The butter in the filling creates a thin barrier between dough layers. In the oven, that fat melts, the trapped steam pushes the coil upward and outward, and the sugar caramelizes against the dough surface. The tightening and the shaping determine whether that steam has anywhere to go — which is why a loose roll produces gappy air channels and a tight roll produces the soft, connected pull-apart texture people actually want.
“The single biggest upgrade to home cinnamon rolls isn’t a secret ingredient — it’s a thermometer. Dough that finishes mixing at 75–78°F ferments on schedule. Dough at 88°F runs ahead of you and turns coarse.”
— WorldDishly test kitchen notes, September 2026
Ingredient Selection and the Science of a Soft Crumb
Flour: bread flour for lift, all-purpose for tenderness
Bread flour at 12–13% protein gives the coil enough elasticity to hold its shape through the second rise without slumping. All-purpose at 10.5–11.7% works too, but reduce the milk by about 15 g, because lower-protein flour absorbs less water and the dough will feel sticky at the same hydration. Do not use cake flour — the gluten network will collapse under the weight of the filling and the rolls will spread sideways in the pan.
Milk: whole, and you don’t need to scald modern milk
Whole milk at 3.25% fat contributes lactose (less sweet than sucrose), fat for tenderness, and proteins that brown during baking. Older recipes call for scalding because raw milk carried enzymes that weakened gluten; modern pasteurized and ultra-pasteurized milk doesn’t have that problem. Warm it to 100–110°F (38–43°C) — the temperature range where instant yeast is most active without being damaged. Above 130°F you begin killing yeast cells; below 70°F fermentation crawls.
Butter: temperature matters more than brand
Use unsalted butter so you control the salt. For the dough, the butter needs to be soft but not greasy — 65–68°F — which means it dents under finger pressure without sliding around the bowl. Add it after the gluten has developed. Fat coats flour proteins and blocks the hydration needed for gluten formation, so butter added at the start produces a slack, weak dough that bakes up flat.[3] European-style butter at 82% fat gives a slightly richer result than 80% American butter, but the difference is subtle compared with getting the temperature right.
Yeast: instant is the practical choice
Instant dry yeast (also sold as rapid-rise or bread-machine yeast) goes straight into the dry ingredients and does not need proofing. Use 7 g — one standard ¼ oz packet, or 2¼ tsp — for 500 g of flour. Active dry yeast works identically but should be bloomed in the warm milk with a pinch of the sugar for 5–10 minutes first. If your kitchen is below 68°F, add an extra 1 g of yeast rather than cranking up the liquid temperature.
Sugar and salt: the two levers people get wrong
Sugar at roughly 10% of flour weight (50 g per 500 g flour) feeds the yeast and keeps the crumb tender, but go much higher and osmotic pressure starts slowing fermentation instead of helping it. Salt at 1.2–1.5% of flour weight (6 g per 500 g) is non-negotiable: it tightens the gluten network, controls yeast activity, and without it the rolls taste flat no matter how much cinnamon you add.
Cinnamon: know which bark you’re buying
Most supermarket cinnamon is cassia (Cinnamomum cassia), often Vietnamese or Indonesian, with a bold, hot, sweet-sharp flavor driven by high cinnamaldehyde content. Ceylon cinnamon (Cinnamomum verum) is milder, more floral, and more expensive. Cassia also contains naturally occurring coumarin; the European Food Safety Authority sets a tolerable daily intake of 0.1 mg of coumarin per kilogram of body weight per day, which is worth knowing if you’re feeding cinnamon rolls to small children regularly.[2] For baking, cassia’s intensity holds up better against brown sugar and butter, so it’s the default here.
By weight: 1 part softened butter to 1.75 parts brown sugar, with cinnamon at roughly 10% of the sugar weight. For a 16 × 12-inch rectangle that’s 85 g butter, 150 g light brown sugar, and 15 g (about 2 tbsp) ground cinnamon, plus a pinch of salt and 1 tsp vanilla. Tasters consistently reject fillings above a 1:1.2 butter-to-sugar ratio — too much fat and the filling slides out during the bake.
Optional: the tangzhong upgrade
Cooking 25 g of the flour with 125 g of the milk to a gel at about 149°F (65°C) before mixing pre-gelatinizes the starch and traps extra water in the crumb. The result stays soft a full day longer than a standard straight dough. It adds one small saucepan and about four minutes.[4] Take the 25 g flour and 125 g milk out of the formula below if you use it.
Prep Plan and Equipment Overview
Cinnamon rolls are not difficult, but they are sequential. Everything below assumes a 75°F kitchen. If yours runs colder, add 20–30 minutes to every rising time and trust the visual cues over the clock.
Same day (2h 45m): mix, bulk 90 min, shape, proof 50 min, bake. Best for a weekend morning if you start by 8 a.m.
Overnight (25 min hands-on + 8–16 h fridge): make the dough the night before, roll and cut, place in the pan, cover and refrigerate. In the morning, pull them out 45–60 minutes before baking, or bake cold and add 5–8 minutes.
Freezer stash: cut the rolls, freeze them solid on a tray, bag them, then thaw overnight in the fridge and proof 60–75 minutes before baking.
The Step-by-Step Master Method
This formula yields 12 rolls in a 9 × 13-inch pan. Ingredient list first, then the sequence.
500 g bread flour · 7 g instant yeast · 50 g granulated sugar · 6 g fine sea salt · 240 g whole milk, 100–110°F · 1 large egg (50 g), room temperature · 85 g unsalted butter, softened to 65–68°F
The roll pulls apart in connected, slightly tacky layers rather than crumbling. The spiral line is visible but the filling has melted into it. The bottom is caramelized at the edges, not burnt or pale. The center is soft but fully set — no raw-dough sheen when you tear one open.
After step 10, cover the pan tightly with plastic wrap and refrigerate for 8–16 hours. The cold slows yeast activity to a crawl, which builds flavor and lets you wake up to shaped rolls. In the morning, either leave the pan on the counter for 45–60 minutes until the dough comes to room temperature and puffs, or bake straight from the fridge at 350°F for 32–38 minutes. Cold dough straight into the oven produces slightly tighter crumb; room-temperature dough produces a taller, fluffier roll.
Key Ratios, Temperatures and Timing
Save this table. Nearly every cinnamon roll problem traces back to one of these numbers.
| Variable | Target | Why it matters |
|---|---|---|
| Milk + egg hydration | 58% of flour weight | Soft but rollable. Above 65% the rectangle is hard to handle; below 52% the bake is dry. |
| Butter in dough | 17% of flour weight | Tenderness and richness. More than 20% starts weakening the gluten network. |
| Sugar in dough | 10% of flour weight | Feeds yeast and browns the crust. Beyond 15% osmotic stress slows fermentation. |
| Salt | 1.2–1.5% of flour weight | Flavor, gluten tightening, yeast control. |
| Instant yeast | 1.4% of flour weight (7 g / 500 g) | Reliable 90-minute bulk ferment at 75°F. |
| Milk temperature | 100–110°F (38–43°C) | Optimal yeast activation window. Fatal above 130°F. |
| Dough temperature after mixing | 75–78°F | Determines whether your rise schedule matches the recipe. |
| Filling butter : brown sugar | 1 : 1.75 by weight | Spreads cleanly and stays in the coil instead of leaking. |
| Cinnamon : sugar | 10% of sugar weight | Bold without turning chalky or bitter. |
| Rolled rectangle | 16 × 12 in, ¼ in thick | Produces 12 evenly sized rolls with a 1½-inch cut height. |
| Bulk ferment | 75–90 min at 75°F | Until doubled. Time is a guide, volume is the truth. |
| Final proof | 45–60 min at 75°F | Until puffy and nearly touching in the pan. |
| Oven temperature | 350°F (175°C), conventional | Gives the filling time to melt without scorching the sugar. |
| Internal doneness | 190–195°F (88–90°C) | Fully gelatinized starch. The only reliable doneness test. |
| Cooling before frosting | 5 minutes (rolls at ~110–120°F) | Frosting melts into spirals rather than sitting on top. |
Fan-assisted ovens run about 25°F hotter in practice. Drop the setting to 325°F and start checking at 20 minutes, or reduce the bake time by 4–6 minutes. The internal temperature target stays the same.
Common Mistakes and Troubleshooting
Every failure below is fixable, and most have a single identifiable cause. Diagnose by symptom.
Raw flour is not a ready-to-eat ingredient — it can carry E. coli and Salmonella, and it has been linked to multiple nationwide recalls. Do not taste the raw dough or let children eat the filling mixture. Baking the rolls to an internal temperature of 190°F or above resolves the risk.[1]
Frosting, Pairing and Storage
Cream cheese frosting (the standard)
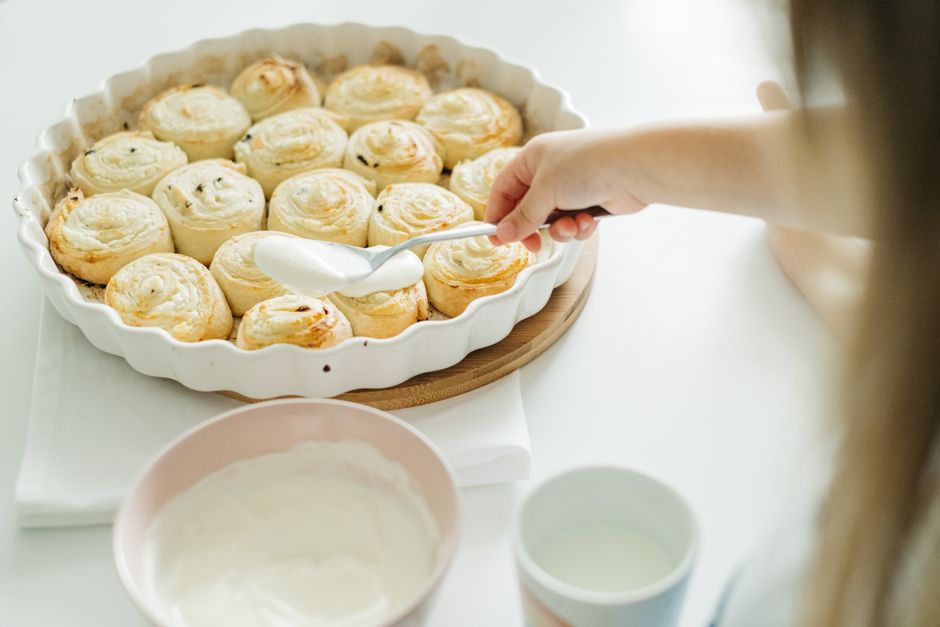
Beat 113 g room-temperature cream cheese and 57 g room-temperature butter until completely smooth and lump-free — this takes 2 full minutes and cannot be rushed; cold cream cheese produces lumps that never smooth out. Add 120 g powdered sugar, 1 tsp vanilla and a pinch of salt, and beat 1 minute more. Add milk 1 tsp at a time if you want a pourable glaze. This makes enough for 12 rolls with a generous hand.
Alternative finishes
- Swedish-style: skip the frosting entirely. Brush the hot rolls with a thin glaze of 60 g powdered sugar whisked with 1 tbsp water and scatter pearl sugar over the top. The cardamom-dough version is built for this.
- Maple butter glaze: 80 g powdered sugar, 2 tbsp maple syrup, 1 tbsp melted butter, pinch of salt. Thinner and less sweet, better on a morning roll than a dessert roll.
- Brown butter icing: brown 57 g butter until the milk solids smell nutty and turn amber, cool 10 minutes, then whisk with 120 g powdered sugar and 1 tbsp milk. Deeper, toastier flavor that stands up to a heavy cassia filling.
- Orange-cardamom: add 1 tsp orange zest and ½ tsp ground cardamom to the cream cheese frosting; swap 1 tsp of the cinnamon in the filling for cardamom.
What to serve with them
Cinnamon rolls are structurally sweet and fatty, so they want bitterness or acidity alongside. Strong black coffee is the classic for a reason: the roast bitterness cuts the sugar. Unsweetened black tea works the same way. Cold whole milk is the comfort pairing. For an actual dessert course, pair with a small pour of bourbon or an amontillado sherry — the nutty, saline notes echo the brown sugar without adding more sweetness.
Storage and reheating
| Method | Duration | How to reheat |
|---|---|---|
| Room temperature, airtight | 2 days | 300°F for 6–8 minutes, tented with foil |
| Refrigerated, airtight | 5 days | 300°F for 10 minutes, tented, then 2 minutes uncovered |
| Frozen, frosted or unfrosted | 3 months | Thaw overnight in the fridge, then 300°F for 10–12 minutes |
| Unbaked, frozen after shaping | 2 months | Thaw overnight in the fridge, proof 60–75 min, bake as normal |
The microwave works in a pinch but turns the outer edge rubbery within 60 seconds. The oven, tented, restores the crisp caramelized bottom edge that makes a cinnamon roll worth eating.
Frequently Asked Questions
Can I make cinnamon rolls without a stand mixer?
Yes. Mix with a stiff spatula until the dough comes together, then knead on a lightly floured counter for 12–15 minutes by hand. Add the softened butter about 4 minutes in, one piece at a time, and expect the dough to feel greasy and slippery for several minutes before it smooths out. The windowpane test is your signal that you’ve kneaded enough — hand-kneaded dough often needs a 5-minute rest midway to relax the gluten so it stops fighting back.
How do I make cinnamon rolls ahead of time?
The overnight refrigerator method is the most reliable. Shape and cut the rolls, place them in the buttered pan, cover tightly with plastic wrap, and refrigerate 8–16 hours. In the morning, either let them sit at room temperature 45–60 minutes until puffy, or bake directly from the fridge at 350°F for 32–38 minutes. You can also freeze the unbaked shaped rolls for up to 2 months, thawing overnight in the fridge before proofing.
Why are my cinnamon rolls hard the next day?
Two causes, usually together: overbaking and insufficient fat or water in the dough. Starch retrogradation — the process where cooked starch molecules re-crystallize and squeeze out water — is unavoidable, but a richer, higher-hydration dough slows it down. Bake to 190°F internal rather than 200°F+, use the full 85 g of butter in the dough, and consider the tangzhong method, which traps extra water in the starch and keeps rolls soft an extra day.
What’s the best pan for cinnamon rolls?
A 9 × 13-inch light-colored metal pan is the default: it heats evenly and produces caramelized edges without scorching. A 10-inch cast-iron skillet gives crisper, darker sides and looks better at the table, but reduce the bake time by 3–5 minutes and start checking at 20. Avoid dark nonstick pans — they absorb more radiant heat and tend to burn the bottoms before the centers are set.
Ceylon or cassia cinnamon for cinnamon rolls?
Cassia for flavor, Ceylon for a milder, more delicate result. Cassia’s high cinnamaldehyde content cuts through brown sugar and butter and tastes like the cinnamon roll most people expect. Ceylon is softer and more floral and works beautifully in a Swedish-style cardamom dough with a light glaze. If you’re baking for small children frequently, Ceylon’s lower coumarin content is worth considering.[2]
Can I use active dry yeast instead of instant?
Yes, in the same quantity by weight. Bloom it first: stir the yeast into the 100–110°F milk with 1 tsp of the recipe’s sugar and let it stand 5–10 minutes until foamy. If it doesn’t foam, the yeast is dead and no amount of kneading will save the batch. Active dry yeast typically ferments slightly slower, so add 10–15 minutes to the bulk ferment.
Do I have to scald the milk?
No. Scalding was necessary with raw milk, which contains enzymes that interfere with gluten and can produce a dense dough. Modern pasteurized and ultra-pasteurized milk have those enzymes deactivated by heat treatment. Warm the milk to 100–110°F and proceed. If you’re using raw milk from a farm share, scald it, then cool it back down to 100–110°F before adding the yeast.
How do I know when the rolls are fully baked?
Use a thermometer, not the clock or the color of the top. Insert an instant-read thermometer into the center of the middle roll and look for 190–195°F (88–90°C). At that temperature the starches have gelatinized and the crumb is set. Lower and you get a gummy streak; higher and you’ve driven off the moisture that makes them tender.
- Add softened butter only after the gluten has developed — 8–10 minutes of kneading first, then butter in four additions, then 8–10 minutes more.
- Keep the filling at 1 part butter to 1.75 parts brown sugar by weight, with cinnamon at 10% of the sugar weight, or it will leak out during baking.
- Chill the rolled log 20–30 minutes before cutting so the spirals stay intact; use dental floss rather than a knife for the cleanest cut.
- Bake at 350°F to an internal temperature of 190–195°F. That number, not the timer, tells you when they’re done.
- Frost while the rolls are still around 110–120°F so the icing melts into the spirals instead of sitting on top.
- For a deeper-flavored batch, refrigerate the shaped rolls 8–16 hours and bake them the next morning.
- U.S. Department of Agriculture / FoodSafety.gov — Safe Minimum Internal Temperatures and raw flour safety guidance. foodsafety.gov
- European Food Safety Authority — Coumarin in cinnamon and cinnamon-containing foods: tolerable daily intake of 0.1 mg/kg body weight. efsa.europa.eu
- Harold McGee, On Food and Cooking: The Science and Lore of the Kitchen — fat’s effect on gluten development and starch gelatinization in enriched doughs.
- King Arthur Baking Company — Tangzhong (water roux) technique and yeast temperature guidance. kingarthurbaking.com
- Visit Sweden — Kanelbullens dag (Cinnamon Bun Day, 4 October) and the Swedish fika tradition. visitsweden.com
This article is provided for general culinary education. Ingredient temperatures, bake times and internal doneness targets are based on a conventional home oven at 350°F and a 75°F kitchen; adjust for altitude, oven calibration and pan material. Always follow safe food handling practices with raw flour and eggs, and consult a qualified professional for individual dietary or allergen concerns.