Ten minutes of standing time, one ice bath, and the right starting water temperature are the difference between a chalky grey ring and a clean, creamy yolk that slips out of its shell in one piece.
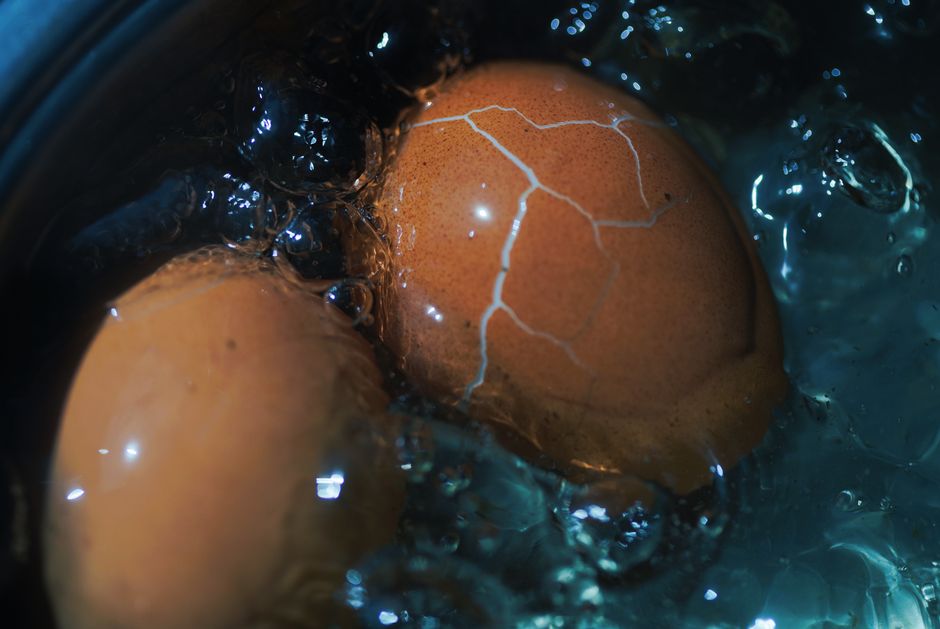
Set your eggs in a single layer in a saucepan, cover them with 1 inch (2.5 cm) of cold water, and bring to a rolling boil over high heat. Pull the pan off the burner, cover it, and let the eggs stand for 10 minutes (large eggs). Then transfer them straight into an ice bath for 10 minutes. That boil-then-rest sequence cooks the white fully set and the yolk firm but creamy, and it hits the USDA’s 160 °F (71 °C) safe minimum for eggs without ever pushing the yolk into the grey-green sulfur zone.[1]
Why Hard-Boiled Eggs Go Wrong: The Protein Science
An egg is two different sets of proteins wrapped in one shell, and they don’t set at the same temperature. Egg white proteins begin coagulating at roughly 145–149 °F (63–65 °C); yolk proteins firm up higher, around 149–158 °F (65–70 °C).[2] That gap is the entire problem: any method that drives heat in fast and hard sets the white to rubber before the yolk center has firmed, and any method that lingers turns the whole egg sulphurous.
The grey-green ring people mistake for spoilage is iron sulfide. Sulfur from the white’s amino acids releases as hydrogen sulfide during heating, drifts to the yolk boundary, and bonds with iron from the yolk.[2] It’s harmless, tasteless in small amounts, and entirely preventable — it forms when eggs cook too long, at too high a heat, or cool too slowly, leaving the reaction running after the burner is off.
Iron sulfide is chemistry, not contamination. A green yolk tells you the egg kept cooking after it should have stopped.
— Paraphrased from Harold McGee, On Food and Cooking[2]
The third variable is mechanical, not thermal: shell membrane adhesion. A fresh egg’s inner membrane clings tightly to the albumen. As the egg ages, carbon dioxide escapes through the porous shell and the albumen’s pH climbs from about 7.6 toward 9.2, which weakens that bond and makes the shell release in sheets rather than shreds.[3] This is why the eggs you bought yesterday are the worst possible eggs for boiling, and why a pinch of baking soda in the water helps: it mimics that pH shift in minutes instead of days.
The Boil-and-Rest Master Method
This is a cold-water start with a covered rest off the heat. It’s forgiving, it works identically for 2 eggs or 12, and it doesn’t require you to lower fragile shells into violently boiling water.
Walking away. An extra 4 minutes in the hot water is the difference between a creamy yolk and a chalky one with a ring around it — and the damage can’t be undone. Set the timer before you take the pan off the heat, not after.
Timing, Temperature, and Altitude Chart
Use a timer, then use a thermometer the first two or three times until you trust your own stove. These numbers assume a covered rest off the heat, starting from cold water, at sea level.
| Doneness | Rest Time (Large Egg) | Boiling-Water Start | Yolk Texture | Target Internal Temp |
|---|---|---|---|---|
| Soft / jammy | 6 minutes | 6 minutes | Liquid center, set white | ~150 °F (66 °C) |
| Medium | 8 minutes | 8 minutes | Fudgy, slightly moist center | ~158 °F (70 °C) |
| Hard (classic) | 10 minutes | 10 minutes | Firm, evenly set, pale yellow | 160–170 °F (71–77 °C) |
| Extra-firm (for salads) | 12 minutes | 11–12 minutes | Dry and crumbly, grates cleanly | 170 °F+ (77 °C+) |
Adjust for Egg Size
| Egg Size | Rest Time (Boil-and-Rest Method) |
|---|---|
| Medium | 9 minutes |
| Large | 10–11 minutes |
| Extra-Large | 12 minutes |
| Jumbo | 13–14 minutes |
Do not microwave a whole egg in its shell, and do not microwave a peeled whole egg either. Steam trapped inside builds pressure faster than the shell or the white can vent, and the egg detonates. Halve or slice eggs before reheating them.
The Easy-Peel Protocol
Peeling is a membrane problem, not a shell problem. Get the inner membrane to release from the albumen and the shell comes away in two or three large pieces. Here’s the sequence that gets you there almost every time.
If your eggs are only two or three days old and peeling is a fight, add ½ teaspoon of baking soda per quart of cooking water. It pushes the water’s pH up toward 9, which is the same shift that seven to ten days of refrigeration produces naturally, and it measurably weakens the bond between the inner membrane and the albumen.[3]
A splash of vinegar in the water helps only in one narrow case: a hairline-cracked shell, where the acid coagulates leaking albumen so it seals the crack instead of streaming into the water. Salt added to boiling water raises the boiling point by a fraction of a degree at normal concentrations — not enough to change your timing. Use the ice bath and the pH trick instead.
Steaming, Pressure Cooking, and Oven Methods
The boil-and-rest method is the most forgiving, but three other approaches are genuinely useful when the stovetop is occupied or when you’re cooking two dozen eggs for deviled eggs.
12–14 minutes over 1 inch of boiling water, lid on. Steam transfers heat fast and the shells never rattle against the pan, so cracking is rare. Ice bath is still mandatory.
The 5-5-5 method: 1 cup water, 5 minutes at high pressure, 5 minutes natural release, 5 minutes in an ice bath. Steam pressure cooking is famous for producing eggs that peel in one motion.[6]
325 °F (165 °C) for 30 minutes on a muffin tin to keep them upright. No water, no pot — but the whites brown slightly and the texture is drier and more sulfurous. Good for bulk, not for finesse.
250 °F (120 °C) for 15–17 minutes, then an immediate ice bath. Same trade-off as the oven: convenient, but slightly drier yolks than a water-based method.
Troubleshooting and Food Safety
Most hard-boiled egg problems trace back to four causes: too much heat, too much time, too slow a cooldown, or eggs that were too fresh. Run through this list before you blame your stove.
Iron sulfide from overcooking or slow cooling.[2] Shave 1–2 minutes off your standing time and get the eggs into ice water immediately after the timer sounds. It’s safe to eat, just a marker that the yolk is overdone.
Eggs were too fresh, or the cooldown was too gradual. Wait 7–10 days after purchase, add baking soda to the water, and shock in ice water rather than letting them cool on the counter.[3]
A dent usually means the egg rested against the pan wall or another egg, or the boiling water was too turbulent. A small brownish spot is a harmless meat spot. Neither is a safety issue.
Thermal shock or a hairline crack. Start from cold water, lower eggs in with a slotted spoon, avoid stacking, and add a teaspoon of vinegar to coagulate any leak. Discard eggs with cracked shells that sat in the water unrefrigerated.
Food Safety Rules That Aren’t Optional
An egg holds enough residual heat to keep the yolk center climbing several degrees after it leaves the pan — the same carryover effect that overcooks a roast. A 10-minute ice bath at 32 °F (0 °C) drops the internal temperature fast enough to halt coagulation at the exact point you want it, and the resulting contraction pulls the albumen away from the inner membrane.[3] Two problems, one bowl.
Equipment That Actually Matters
You don’t need a dedicated egg cooker. You do need four things to be right.
Gadgets you can skip: egg piercers (they crack as many shells as they save), egg timers that sit in the pot (they measure water temperature, not yolk doneness), and dedicated electric egg cookers — they work, but a saucepan does the same job with more control.
Storage and Shelf Life
Cool the eggs completely, then refrigerate them. Shell-on hard-cooked eggs keep for up to 1 week in the refrigerator, according to USDA guidance.[1] Store them in a covered container rather than the open carton if you want to avoid absorbing fridge odors through the porous shell.
FAQ
How long do you hard boil eggs?
Using the boil-and-rest method: bring to a rolling boil, remove from heat, cover, and stand 10 minutes for large eggs, 9 for medium, 12 for extra-large, and 13–14 for jumbo. If you lower eggs directly into already-boiling water, use the same times from the moment they go in. Add 1 minute per 1,000 feet of elevation above 3,000 feet.
Why does my hard-boiled egg yolk turn green or grey?
Sulfur from the egg white reacts with iron from the yolk to form iron sulfide at the boundary — a harmless compound triggered by overcooking, high heat, or slow cooling.[2] Cut your standing time by 1–2 minutes and move the eggs into ice water the second the timer goes off.
How do I peel hard-boiled eggs without tearing the white?
Use eggs that are 7–10 days old, add ½ teaspoon baking soda per quart of cooking water, chill them hard in an ice bath, crack the fat (air-cell) end first, roll gently to craze the shell, and peel under cold running water, taking the inner membrane along with the shell.[3]
Can you hard boil fresh eggs straight from the farm?
You can, but expect difficult peeling. Very fresh eggs have a low albumen pH (around 7.6), which makes the inner membrane cling tightly to the white.[3] Either wait a week, or compensate with baking soda in the water and a longer ice bath.
Do hard-boiled eggs need to be refrigerated?
Should I start eggs in cold water or boiling water?
Both work. Cold-water start with a covered rest off the heat is more forgiving and nearly impossible to overcook if you set a timer. Boiling-water start shaves a minute or two and, by some accounts, peels slightly more cleanly because the sudden heat shock contracts the membrane — but it demands a slotted spoon and a steady hand.[3]
Why did my egg crack in the pot?
Almost always thermal shock or impact: eggs dropped into already-boiling water, stacked on top of each other, or lowered too fast into a thin-bottomed pan with a hot spot. Start from cold water, use a slotted spoon, keep them in a single layer, and add a teaspoon of vinegar so any leak coagulates quickly instead of clouding the water.
Are hard-boiled eggs healthy?
One large hard-boiled egg provides roughly 78 calories, 6.3 grams of complete protein, and a range of B vitamins, choline, and selenium.[5] With no added fat in the cooking water, it’s one of the most efficient protein-per-calorie foods in a home kitchen.
Can I hard boil eggs in an air fryer or oven?
Yes — 250 °F (120 °C) for 15–17 minutes in an air fryer, or 325 °F (165 °C) for 30 minutes in a muffin tin in a conventional oven. Both need an immediate ice bath afterward. The texture is slightly drier than water-based methods.[6]
- Bring eggs to a rolling boil in 1 inch of cold water, then kill the heat and stand covered for 10 minutes (large eggs).
- Ice-bath for 10 minutes immediately — it stops carryover cooking and loosens the shell membrane in one move.
- Eggs 7–10 days old peel cleanly; ½ teaspoon of baking soda per quart of water fakes that aging for fresh eggs.
- The grey-green ring is iron sulfide from overcooking or slow cooling, not spoilage — and it’s preventable.
- Refrigerate cooked eggs within 2 hours and eat them within 1 week; jammy eggs don’t reach the 160 °F safety target and shouldn’t be stored long.
- USDA Food Safety and Inspection Service. “Shell Eggs from Farm to Table.” fsis.usda.gov
- McGee, Harold. On Food and Cooking: The Science and Lore of the Kitchen. Scribner, 2004 — egg protein coagulation temperatures and iron sulfide discoloration.
- López-Alt, J. Kenji. “The Secrets to Peeling Hard-Boiled Eggs.” Serious Eats. seriouseats.com
- USDA Food Safety and Inspection Service. “Danger Zone (40°F – 140°F).” fsis.usda.gov
- USDA Agricultural Research Service. FoodData Central: “Egg, whole, cooked, hard-boiled.” fdc.nal.usda.gov
- American Egg Board. “How to Hard-Boil Eggs.” incredibleegg.org
Nutrition figures are approximate and drawn from USDA FoodData Central for a single large (50 g) hard-cooked egg. Cooking times vary with pan material, burner output, egg size, starting temperature, and altitude — always confirm doneness with an instant-read thermometer and follow current USDA food safety guidance for storage and holding times.