A 10-ounce, two-inch-thick breast is the hardest cut in the weeknight rotation to nail — the tapered tip hits 180°F while the center is still pink. Here’s the salt-first, sear-then-roast method that gets every part of it to 165°F at the same moment.
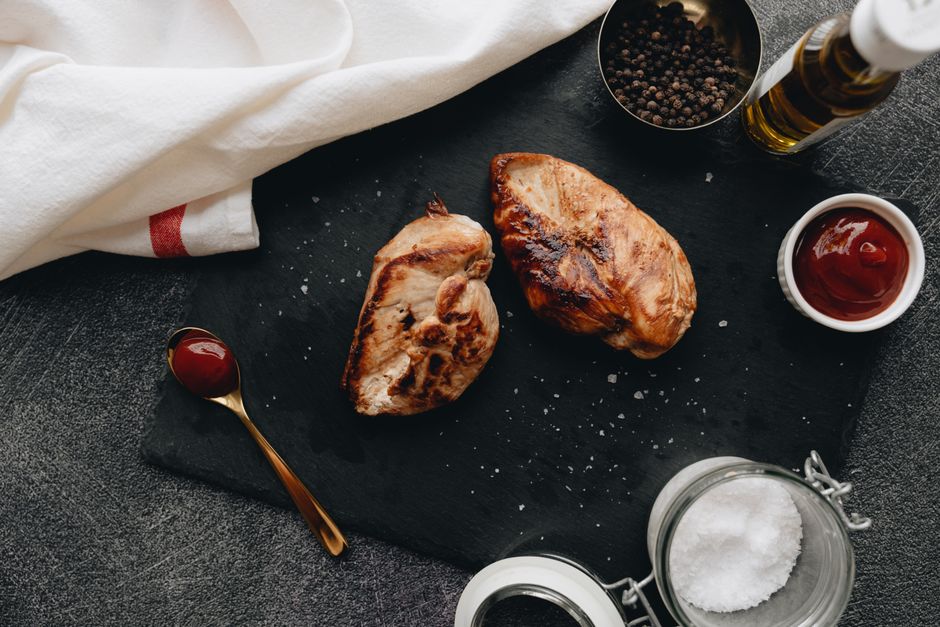
Dry-brine the breast with 1% salt by weight (about ¾ teaspoon Diamond Crystal kosher salt per 8 ounces) for 40 minutes, or up to 24 hours uncovered in the fridge. Level it to an even 1 inch with a mallet or a horizontal butterfly cut. Sear 2 minutes per side in a ripping-hot cast-iron pan, then finish in a 425°F (220°C) oven for 8–12 minutes. Pull it at 155–158°F (68–70°C) and rest 5–10 minutes — carryover heat lands it at the USDA’s 165°F (74°C) mark without squeezing the muscle fibers dry. Sous vide at 145°F (63°C) for 2 hours is the zero-fail alternative.
- Why thick chicken breasts dry out (the meat science)
- The 7-point juiciness checklist
- Step-by-step: the sear-and-roast master method
- Temperature and timing chart by cooking method
- Sous vide, reverse sear, poach and air fryer variations
- Seven mistakes that turn thick breasts to sawdust
- Equipment that actually matters
- Storage, reheating and make-ahead
- FAQ
Why Thick Chicken Breasts Dry Out (the Meat Science)
Supermarket breasts have gotten bigger over the past two decades — 8 to 12 ounces is now normal, and the thickest point at the sternum end can measure 1.5 to 2 inches while the tapered tip thins to half an inch. That geometry, not your cooking skill, is what usually ruins dinner. Heat always moves outside-in, so by the time the geometric center of a two-inch breast reads 165°F, the outer half-inch has been sitting above 175°F for several minutes.
What happens at those temperatures is measurable. Chicken muscle holds its water inside bundles of myofibrils. As the meat passes roughly 120–140°F, the myosin proteins denature and the fibers begin to contract; between 140°F and 160°F, the connective tissue sheaths shrink hard and physically wring moisture out of the fibers.[4] Most of the drip loss in a roasted breast happens inside that 20-degree window.[4] Overshoot it by 15 degrees and you’ve expelled water the meat cannot reabsorb.
“The goal isn’t to cook chicken to 165°F. It’s to get every part of that breast to 165°F at the same moment — and then stop.”
— WorldDishly test kitchen
Poultry must reach 165°F (74°C) as measured by a food thermometer in the thickest part of the breast to be considered safely cooked.[1] FSIS also publishes time-and-temperature tables showing that the same lethality (a 7-log reduction of Salmonella) is achieved at lower temperatures held for longer — for example, roughly 145°F (63°C) held for about 9–10 minutes at the core.[2] That equivalence is the entire scientific basis of sous vide chicken.
The 7-Point Juiciness Checklist
Work through these before the pan even hits the burner. Skip one and the odds of a dry breast climb fast.
Step-by-Step: The Sear-and-Roast Master Method
This is the default technique for a thick boneless, skinless breast — 8 to 12 ounces, 1 to 1.5 inches thick. Total active time is about 12 minutes; total time from fridge is roughly an hour, most of it hands-off brining.
A cold pan (prolongs cooking, no crust forms until the meat is already half-cooked), uneven thickness (the thin end hits 180°F while the thick end is at 140°F), and cooking by clock instead of thermometer. Fix those three and 90% of dry chicken disappears from your kitchen.
Temperature and Timing Chart by Cooking Method
Pull temperatures below account for carryover cooking during the rest. If you’re serving a breast immediately with no rest at all, add 5°F to the pull target.
| Method | Cooking Temp | Pull At (Core) | Approx. Time (1-in. breast) | Rest |
|---|---|---|---|---|
| Sear + roast | 425°F (220°C) oven | 155–158°F (68–70°C) | 2 min/side sear + 8–12 min oven | 5–10 min |
| Reverse sear | 275°F (135°C) oven | 145–150°F (63–65°C) before searing | 20–30 min oven + 45–60 sec/side sear | 5 min |
| Sous vide | 145°F (63°C) water bath | 145°F held 1.5–4 hrs | 1.5–4 hrs depending on thickness[3] | 5 min |
| Poach | 165–170°F (74–77°C) water | 160°F (71°C) | 12–18 min | 5 min |
| Air fryer | 375°F (190°C) | 158°F (70°C) | 12–15 min, flip at 8 | 5 min |
| Two-zone grill | Direct high, then indirect medium | 155–158°F (68–70°C) | 4–5 min direct + 8–12 min indirect | 5–10 min |
165°F is the temperature at which poultry pathogens die essentially instantly. That’s why the USDA sets it as the single-number rule for home cooks.[1] But lethality is a function of temperature and time: the same 7-log reduction occurs at 145°F held about 9–10 minutes at the core, or 150°F held roughly 3–4 minutes.[2] A breast cooked sous vide at 145°F for two hours is fully pasteurized and noticeably juicier than one roasted to 165°F — it’s chemistry, not a shortcut.
Sous Vide, Reverse Sear, Poach and Air Fryer Variations
Sous vide at 145°F — the zero-fail method
Season the breast, seal it with 1 teaspoon of butter or olive oil, and cook at 145°F (63°C) for 1.5 to 4 hours. A 1-inch breast pasteurizes in about 45 minutes at that temperature; going to 2 hours simply improves texture without risk.[3] Chill the bag in ice water for 10 minutes if you plan to sear, then pat dry and sear 45–60 seconds per side in a smoking-hot pan. The interior stays at 145°F, which is the juiciest safe chicken you can produce at home.
Reverse sear — best for very thick, bone-in or 2-inch breasts
Cook on a wire rack at 275°F (135°C) until the core reads 145–150°F — typically 20 to 30 minutes for a 1-inch breast, 35 to 45 minutes at 2 inches. Rest 10 minutes, then sear 45–60 seconds per side. Because the interior is already cooked through, the sear adds crust without adding interior heat, so there is almost no gradient between the crust and the center.
Poaching — the leanest, most forgiving method
Hold water or stock at 165–170°F (74–77°C) — a bare quiver, never a boil — and submerge the breast for 12–18 minutes. Boiling at 212°F contracts the fibers violently and produces the stringiest meat of any method. Poached chicken is ideal for shredding into salads and grain bowls, and it stays moist for 3–4 days refrigerated.[5]
Air fryer — the 15-minute weeknight option
Preheat to 375°F (190°C) for 3 minutes. Cook the leveled breast for 12–15 minutes, flipping at the 8-minute mark and checking the core at 11 minutes. Air fryers move heat fast; the difference between 158°F and 175°F can be 90 seconds, which is why the thermometer matters even more here than in the oven.
Velveting for stir-fries
Slice the raw breast thinly across the grain, toss with ½ teaspoon baking soda per 8 ounces, and rest 15 minutes. Rinse thoroughly, pat dry, then coat with 1 teaspoon cornstarch and 1 teaspoon soy sauce. The alkaline baking soda raises surface pH and limits protein cross-linking, so the slices stay tender through a 400°F wok sear. Skip the baking soda step on whole breasts — it turns the exterior spongy.
Dry brine (preferred): 1% salt by weight — 2.3 g per 8-ounce breast. Forty minutes minimum, 24 hours maximum (uncovered in the fridge).
Wet brine: 5% salinity — 50 g kosher salt dissolved in 1 L cold water. Submerge 45–60 minutes; the meat ends up at roughly 1% salt. Past 4 hours the exterior turns distinctly hammy.
Equilibrium brine: 1% salt plus 0.5% sugar by the combined weight of meat and water, 2–4 hours. This is the only brine you can safely leave overnight without overshooting.
Seven Mistakes That Turn Thick Breasts to Sawdust
Equipment That Actually Matters
You can cook a perfect thick breast in a $30 skillet. You cannot cook one reliably without accurate temperature feedback.
- Instant-read digital thermometer — a ThermoPop, Thermapen, or any probe rated ±1°F. Non-negotiable.
- 10- or 12-inch cast-iron or carbon-steel skillet — retains heat when cold meat hits the surface, which a thin nonstick pan cannot do.
- Rimmed sheet pan + wire rack — for dry-brining in the fridge and for oven finishing if your skillet isn’t oven-safe.
- Meat mallet or heavy rolling pin — for leveling thickness under plastic wrap.
- Kitchen scale — reading in grams makes 1% salt dosing exact instead of approximate.
- Sous vide circulator (optional) — the only method that guarantees a 145°F core, edge to edge.
Storage, Reheating and Make-Ahead
Cooked chicken keeps 3 to 4 days in the refrigerator when stored in a shallow, covered container within 2 hours of cooking.[5] The two-hour rule is not flexible — leave a breast on the counter longer than that and it belongs in the bin, not the fridge.
Reheating is where most people undo their good work. A microwave on high drives internal temperatures past 180°F and toughens the fibers. Instead, reheat gently: 300°F oven for 8–10 minutes covered with foil, a covered skillet over low heat with 1 tablespoon of stock, or sous vide at 140°F for 15 minutes. If you’re eating it cold in a salad, skip reheating entirely — cold sliced chicken retains noticeably more moisture than reheated chicken.
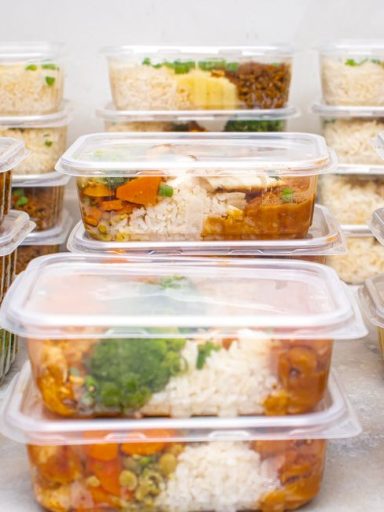
For meal prep, the sous vide method wins outright. Cook four breasts at 145°F for 2 hours, chill them in an ice bath, and store them in their bags. They reheat in 10 minutes with zero moisture loss.
FAQ
Is 165°F really required, or can I pull chicken at 150°F?
For home cooking, 165°F is the number the USDA publishes because it’s the temperature at which poultry pathogens are destroyed essentially instantly, with no holding time required.[1] The time-at-temperature tables show equivalent lethality at 150°F held for roughly 3–4 minutes and at 145°F held about 9–10 minutes.[2] Pulling a roasted breast at 150°F and resting it produces a final temperature near 158°F, which does not meet the instant-read standard. If you want the juicier 145°F result, use sous vide with a verified hold time — don’t simply undercook a roasted breast and hope.
How long should I dry-brine a thick chicken breast?
Forty minutes is the practical minimum for the salt to dissolve and begin moving into the meat. Four to twenty-four hours uncovered in the refrigerator gives the best result: deeper seasoning, a drier surface that sears better, and measurably less moisture loss during cooking. Beyond 24 hours with a 1% salt dose, the texture starts to firm up like deli meat.
Can I brine in buttermilk or yogurt instead of salt water?
Yes, but understand what you’re getting. Buttermilk is weakly acidic (around pH 4.5) and lightly salted, so it tenderizes the surface proteins rather than deeply hydrating the interior. Two hours maximum, and wipe off the excess before searing — dairy proteins burn at skillet temperatures and will scorch before the chicken browns. A 1% dry brine plus a buttermilk marinade is a strong combination for fried or roasted breasts.
Why is my chicken still dry even though the thermometer read 165°F?
Two likely culprits. First, the thermometer was in the wrong spot — near the pan surface, in a fat pocket, or at the thin tapered end rather than the true thickest point. Second, the breast spent 10+ minutes climbing from 140°F to 165°F, which is exactly the window where the majority of drip loss occurs.[4] A fast finish (hot oven or sous vide) shortens that window dramatically.
Can I cook a thick breast straight from frozen?
You can, but you’ll lose the ability to salt ahead or level the thickness. Bake from frozen at 375°F (190°C) on a rack-lined sheet pan for 30–40 minutes for an 8-ounce breast, seasoning the surface as soon as it’s thawed enough to hold salt. The exterior will always be firmer than a fresh-cooked breast. Thaw overnight in the refrigerator for noticeably better results.
What’s the best temperature for sous vide chicken breast?
145°F (63°C) is the sweet spot for texture — firm but distinctly juicy — and requires about 45 minutes at the core for pasteurization, so a 1.5- to 2-hour cook is comfortably safe.[3] Drop to 140°F (60°C) for a softer, more translucent texture (needs roughly 2 hours minimum). Go up to 150°F (65.5°C) if you dislike any pinkness at all. All three are fully pasteurized when held for the corresponding time.
Is slightly pink chicken safe to eat?
Color is not a safety indicator. Young birds and chicken that has been frozen can retain pink myoglobin even at 165°F, particularly near the bone. Conversely, a breast can look white and still be under 165°F. Use the thermometer, not the hue.[1]
Does pounding chicken breast make it dry?
Only if you overdo it. Pounding to a uniform 1 inch improves evenness and therefore reduces dryness, because no portion of the meat overshoots. Pounding to ½ inch or thinner creates a large surface area relative to volume, so the interior dries out quickly — that’s a cutlet, not a thick breast, and it needs a 3–4 minute cook, not 12.
- Salt first: 1% salt by weight, 40 minutes minimum, 24 hours ideal — dry-brining is the single biggest juiciness lever.
- Equalize thickness to 1 inch before cooking; uneven thickness, not cooking method, causes most dry chicken.
- Sear 2 minutes per side in a preheated cast-iron pan, then finish at 425°F (220°C) for 8–12 minutes.
- Pull at 155–158°F (68–70°C) and rest 5–10 minutes — carryover heat delivers 165°F (74°C) without overshooting.[1]
- Sous vide at 145°F (63°C) for 2 hours is the most forgiving route to safe, juicy chicken.[3]
- Store cooked chicken 3–4 days refrigerated and reheat gently at 300°F, never on full microwave power.[5]
- USDA Food Safety and Inspection Service, “Safe Minimum Internal Temperature Chart” — poultry to 165°F (74°C). fsis.usda.gov
- USDA FSIS, “FSIS Cooking Guideline for Meat and Poultry Products” (Appendix A: time/temperature tables for lethality in poultry). fsis.usda.gov/guidelines
- Douglas Baldwin, “A Practical Guide to Sous Vide Cooking” — pasteurization times and temperatures for poultry. douglasbaldwin.com
- Harold McGee, On Food and Cooking: The Science and Lore of the Kitchen, revised edition (2004) — myofibrillar protein denaturation, collagen shrinkage and moisture loss in meat.
- USDA FSIS, “Leftovers and Food Safety” — the 2-hour rule and 3–4 day refrigeration limit for cooked poultry. fsis.usda.gov
Nutrition and food-safety notes in this article reflect USDA FSIS guidance and published food-science sources as of September 2026. Cooking times are estimates for conventional home ovens and cooktops; always verify doneness with a calibrated instant-read thermometer inserted into the thickest part of the breast. If you are cooking for anyone pregnant, immunocompromised, elderly, or very young, follow the 165°F (74°C) instant-read standard rather than time-at-temperature alternatives.