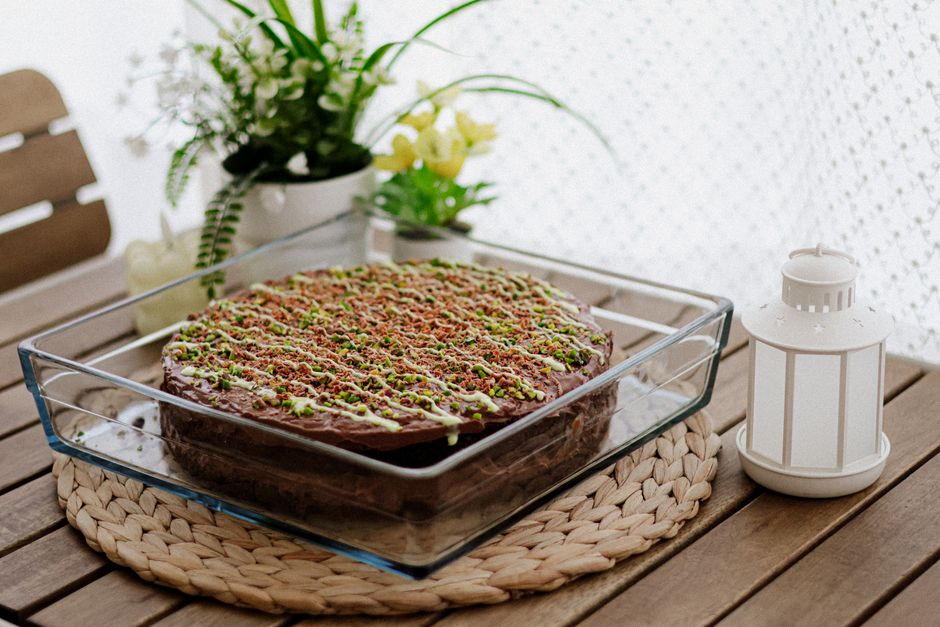
A weight-based, two-layer chocolate cake built on bloomed cocoa, buttermilk, and oil — engineered so the crumb stays tender at 24 hours and the tops bake flat without trimming.
Whisk 210 g all-purpose flour, 65 g Dutch-process cocoa, 265 g sugar, 1½ tsp baking powder, ¾ tsp baking soda and ¾ tsp salt; separately combine 3 eggs, 240 ml buttermilk, 120 ml neutral oil and 1 tbsp vanilla, then stir in 180 ml hot coffee. Fold the two together in 15 strokes, divide between two 8-inch parchment-lined pans, and bake at 350°F (175°C) for 30–35 minutes until the center reads 200–205°F (93–96°C). Cool 10 minutes in the pans before turning out.
- Flavor profile and where this cake comes from
- Ingredient selection and the chemistry behind each one
- Prep and equipment overview
- The step-by-step master method
- Key ratios, pan sizes, and temperature table
- Common mistakes and troubleshooting
- Frosting, pairing, and storage notes
- Frequently asked questions
Flavor Profile and Where This Cake Comes From
This is the American butter-cake lineage, not the European torte. It descends from the “devil’s food” branch of the late 19th century, when American bakers began adding baking soda to cocoa-heavy batters and discovered that the alkali neutralized cocoa’s natural acidity, deepening color and pushing the crumb toward a soft, velvety texture rather than a dense, fudgy one. The defining traits of the style: a dark mahogany crumb, a tender but sliceable structure, and a flavor that reads as cocoa first and sugar second.
The version below borrows three techniques from modern professional baking. First, blooming the cocoa in hot liquid before it ever meets the flour — cocoa’s flavor compounds are fat- and water-soluble to different degrees, and hot water releases the ones cold batter leaves locked in.[3] Second, oil rather than all butter as the primary fat, because oil stays liquid at room temperature and keeps the crumb soft on day two. Third, a hot-liquid finish, which gelatinizes part of the flour starch early and produces the thin, pourable batter that bakes into an even, flat-topped layer.
“A chocolate cake’s flavor is decided before it goes in the oven — the moment hot water hits the cocoa. Everything after that is structure.”
— Common principle in professional pastry kitchens
If you want the fudgier, denser style instead — flourless, molten, or brownie-like — that is a different formula with a different fat-to-flour ratio. This recipe sits deliberately in the middle: rich enough to eat plain, sturdy enough to stack and frost.
Ingredient Selection and the Chemistry Behind Each One
Cocoa powder: Dutch-process, not natural
Use 65 g (⅔ cup) of Dutch-process (alkalized) cocoa. Alkalization raises the pH from roughly 5.5 to 7–8, which darkens the powder, tames harsh acidity, and dissolves more readily in liquid.[4] Natural cocoa is more acidic and reacts aggressively with baking soda — if you substitute it one-for-one, keep the baking soda and reduce the baking powder to ½ tsp, or the cake will dome and then collapse.
pH 7–8. Deep reddish-black color, mellow rounded flavor, dissolves easily in hot liquid. Pairs with baking powder as the main lift. Use this.
pH ~5.5. Lighter, more orange-red, sharper and fruitier. Needs baking soda for lift and an acidic liquid to balance. Works, but changes color and crumb.
Fat: neutral oil plus the cocoa’s own cocoa butter
120 ml (½ cup) of canola, sunflower, or grapeseed oil. Oil coats flour proteins without setting firm when cold, which is why oil-based chocolate cakes outlast butter-based ones in moisture retention. Butter contributes flavor, but in a cocoa-forward cake that flavor is buried — spend your fat budget on texture instead.
Acid: buttermilk does two jobs
240 ml (1 cup) buttermilk contributes acidity that activates the baking soda, and its protein and fat add tenderness. If you have none, stir 1 tbsp lemon juice or white vinegar into 240 ml whole milk and rest 10 minutes; the resulting curdle is exactly what you want.
Sugar: 265 g, no more
Sugar is structural, not just sweet. It holds water, slows gluten development, and keeps the crumb from drying. Go above roughly 300 g per 210 g flour and the crust turns sticky and the interior turns gummy, because excess sugar outpaces starch gelatinization during the bake.
Leaveners: a two-part system
1½ tsp baking powder plus ¾ tsp baking soda. The baking powder handles most of the lift; the small soda dose neutralizes residual cocoa acidity and accelerates browning. Doubling the soda is the single most common reason home chocolate cakes taste soapy and bitter — measure it level, not heaped.
Eggs and buttermilk at 20–22°C (68–72°F) emulsify into the batter cleanly. Cold buttermilk added to room-temperature oil will break the emulsion into visible streaks and give you a tighter, less even crumb. Pull both from the fridge 45 minutes before you start.
Prep and Equipment Overview
Deep chocolate batter stains and clings, so set up before you mix. Total active time is about 20 minutes; total time to a cooled, frostable cake is roughly 2 hours.
Preheat for a full 20 minutes. Most ovens need that long to stabilize at 350°F (175°C), and an under-preheated oven is the hidden cause of sunken centers.
The Step-by-Step Master Method
Set a rack in the lower-middle position and preheat to 350°F (175°C) for at least 20 minutes. Line the bottoms of two 8-inch pans with parchment rounds, grease the sides, and dust with cocoa powder, tapping out the excess.
In a heatproof bowl or saucepan, whisk the 65 g cocoa with the 180 ml hot coffee (or boiling water) until completely smooth. It will look like a thin, glossy paste. Let it stand 5 minutes, then whisk in the buttermilk to bring the mixture down to lukewarm — about 40°C (104°F).
In a large bowl, whisk 210 g flour, 265 g sugar, 1½ tsp baking powder, ¾ tsp baking soda, and ¾ tsp fine salt for a full 30 seconds. This breaks up cocoa clumps and distributes leavening so no single bite tastes metallic.
In a separate bowl, whisk the 3 room-temperature eggs with the 120 ml oil and 1 tbsp vanilla until uniformly blended, about 60 seconds. There’s no need to whip to a foam — air is not your leavening agent here, and over-aeration causes doming.
Whisk the egg-oil mixture into the lukewarm cocoa-buttermilk base until smooth. Doing this in two stages prevents the emulsion from breaking.
Add the dry mixture in two additions, folding with a spatula. Stop the instant the last dry streaks disappear, roughly 15 folds. The batter should be thin enough to pour. Over-mixing here develops gluten and gives you a rubbery layer.
Pour into the two pans and weigh them — you’re aiming for roughly 570–600 g of batter per pan. Even division is what produces two layers of equal height that stack without trimming.
Bake 30–35 minutes. Rotate the pans front-to-back at the 22-minute mark and do not open the door before then. Doneness: the center reads 200–205°F (93–96°C) on an instant-read thermometer, and a skewer inserted at the center comes out with a few moist crumbs, not wet batter.
Cool in the pans on a rack for exactly 10 minutes, then turn out onto the rack, peel off the parchment, and immediately wrap each warm layer tightly in plastic wrap. The trapped steam redistributes moisture through the crumb and keeps the edges from firming up. Cool completely before frosting, about 90 minutes.
Level the domed top of one layer with a serrated knife if needed, place it cut-side down, spread about 1 cup of frosting, add the second layer, then coat the outside. Chill 20 minutes to set the crumb coat before the final pass.
Heat 240 ml heavy cream to a bare simmer, pour over 225 g chopped 60–70% dark chocolate and a pinch of salt, rest 2 minutes, then stir from the center outward until glossy. Cool to 21°C (70°F) — thick but still pourable — then whip 30–60 seconds with a hand mixer until it lightens to a spreadable frosting. It holds a sharp edge and tastes like the cake rather than like powdered sugar.
Never open the oven in the first 22 minutes. The structure of this batter sets late — it goes from pourable liquid to set cake in a narrow window, and a blast of cool air in that window collapses the center permanently.
Key Ratios, Pan Sizes, and Temperature Table
These are the numbers worth memorizing. Everything else in the formula can flex; these can’t.
| Variable | Target | Why It Matters |
|---|---|---|
| Flour : cocoa : sugar | 210 g : 65 g : 265 g (≈ 3.2 : 1 : 4) | Below 3:1 cocoa-to-flour the cake loses chocolate identity; above 4.5:1 sugar the crumb turns gummy |
| Buttermilk : oil | 2 : 1 by volume | More oil than this and the crumb goes greasy and heavy at the base |
| Leavening per 210 g flour | 1½ tsp baking powder + ¾ tsp baking soda | Doubling the soda makes the cake taste bitter and soapy |
| Two 8-inch rounds | 350°F / 175°C, 30–35 min | 570–600 g batter per pan |
| Three 8-inch rounds | 350°F / 175°C, 24–26 min | Thin layers, more frosting surface |
| Two 9-inch rounds | 350°F / 175°C, 26–30 min | Shallower batter, faster set |
| 9×13-inch sheet pan | 350°F / 175°C, 32–38 min | Bake as a single slab; frost in the pan |
| Cupcakes | 350°F / 175°C, 18–21 min | Fill liners two-thirds full |
| Internal doneness | 200–205°F / 93–96°C | Above 210°F the crumb turns dry and crumbly |
| Pan rest before turning out | 10 minutes | Less and it tears; more and steam makes the base soggy |
If you change only one thing from a standard box or vintage recipe, change the cocoa and the liquid. Dutch-process cocoa bloomed in hot coffee is responsible for more of this cake’s flavor than any other single decision — including the frosting.
Common Mistakes and Troubleshooting
Nearly every chocolate cake failure traces back to one of seven causes. Match your symptom to the fix.
A skewer in a dark, moist chocolate cake is genuinely ambiguous. Insert it just off-center — the true center of a round cake bakes last, so testing there gives you a false “raw” reading. Then confirm with the thermometer. If the skewer has moist crumbs and the center reads 202°F, it’s done.
Frosting, Pairing, and Storage Notes
Frostings that work
The cake is assertive, so the frosting should be either creamy or tart, not sweeter than the cake itself. Whipped dark chocolate ganache (above) is the default. Cream cheese frosting cut with 30 g less sugar than usual adds a lactic tang that sharpens the cocoa. A simple sour cream chocolate frosting is the classic American pairing: 115 g softened butter, 200 g powdered sugar, 60 g cocoa, 120 g sour cream, 1 tsp vanilla, whisked until spreadable.
What to serve alongside
- Coffee or espresso — the roast bitterness mirrors the cocoa and reduces perceived sweetness.
- Cold whole milk — the fat coats the palate and makes the crumb feel richer.
- Raspberry or sour cherry — acid cuts through the fat and sugar better than any other fruit.
- Flaky salt — a few grains on the frosting surface do more than any extra extract.
Storage: the exact windows
Unfrosted layers, wrapped tightly in plastic and then foil, keep at room temperature for 2 days, in the refrigerator for 5 days, and in the freezer for up to 3 months. Frosted cake holds 2 days covered at room temperature or 5 days refrigerated — bring it to room temperature for 30 minutes before serving, because refrigeration firms the fat in both cake and frosting.
Per USDA FSIS, perishable foods left in the 40–140°F (4–60°C) range for more than 2 hours should be discarded; above 90°F (32°C), that window shrinks to 1 hour.[1] A frosted cake contains eggs, dairy, and often cream, so a cake that has sat out all afternoon at a warm room temperature is not a safe next-day breakfast.
This batter contains raw eggs, and flour itself is a raw agricultural product that can carry pathogens. The FDA’s position is unambiguous: raw dough and batter should not be tasted, regardless of how the eggs were sourced.[2] Lick the spatula after the bake, not before.
Frequently Asked Questions
Can I use natural cocoa instead of Dutch-process?
Yes, with adjustments. Reduce the baking powder to ½ tsp and keep the ¾ tsp baking soda — natural cocoa’s acidity needs the soda to lift. Expect a lighter, more reddish-brown crumb and a slightly sharper, fruitier chocolate flavor. The bake time stays the same.
What if I don’t have buttermilk?
Stir 1 tbsp lemon juice or white vinegar into 240 ml whole milk and let it stand 10 minutes until it visibly thickens. Plain yogurt thinned with milk to a buttermilk consistency also works. Do not use skim milk — the fat contributes tenderness here.
Can I use boiling water instead of coffee?
Yes. The coffee’s role is to bloom the cocoa and deepen the roast notes by roughly 5–10%, not to make the cake taste like coffee. Boiling water produces a cleaner, more purely chocolate flavor. If you’re serving to children or avoiding caffeine, water is the right call.
How do I turn this into a 9×13-inch sheet cake?
Use the identical formula in a greased, parchment-lined 9×13-inch pan and bake at 350°F (175°C) for 32–38 minutes. The batter is deeper in a sheet pan than in rounds, so the center takes longer than you’d expect. Frost it directly in the pan and serve from the pan.
Can I make this cake ahead of time?
It’s actually better on day two. Bake the layers, steam-wrap them warm, and store at room temperature overnight; the crumb tightens and the chocolate flavor deepens. For longer storage, freeze the wrapped layers for up to 3 months and thaw at room temperature for 2 hours before frosting. Frosted cake can be made 24 hours ahead and refrigerated.
Why is my cake dry even though I followed the recipe?
Three usual suspects, in order of likelihood: your oven runs hot and the internal temperature passed 210°F; you scooped flour by volume and packed in closer to 260 g instead of 210 g; or you used a dark nonstick pan, which over-bakes the base. Weigh your flour and buy an inexpensive oven thermometer before changing anything else in the formula.
Can I make this gluten-free?
Yes — substitute a 1:1 gluten-free all-purpose blend that contains xanthan gum, gram for gram, and add 2 tbsp (15 g) additional cocoa to compensate for the blend’s weaker structure. Increase the buttermilk by 2 tbsp, since GF blends absorb more liquid. Bake 5 minutes longer and test with the thermometer, not the clock.
- Dutch-process cocoa bloomed in hot coffee or boiling water is the single biggest flavor upgrade in this recipe.
- The formula’s core ratio is 210 g flour : 65 g cocoa : 265 g sugar, with leavening at 1½ tsp baking powder and ¾ tsp baking soda.
- Bake at 350°F (175°C) to an internal temperature of 200–205°F (93–96°C) — not to a timer.
- Cool 10 minutes in the pan, then steam-wrap the warm layers in plastic to lock in moisture.
- Oil, not butter, is what keeps this cake tender on day two.
- Do not taste raw batter; flour and eggs both carry food-safety risk before baking.
- USDA Food Safety and Inspection Service — “Danger Zone (40°F–140°F)”, food safety basics on time-temperature control for perishable foods.
- U.S. Food and Drug Administration — “What You Need to Know About Egg Safety”, guidance on raw eggs and raw batter consumption.
- McGee, Harold. On Food and Cooking: The Science and Lore of the Kitchen. Revised edition, Scribner, 2004 — cocoa flavor compound solubility, starch gelatinization, and fat behavior in baked goods.
- King Arthur Baking Company — “Dutch-Process vs. Natural Cocoa Powder”, reference on cocoa pH, alkalization, and leavening substitution.
Recipe tested at sea level with a conventional oven. High-altitude bakers (above 3,000 ft / 900 m) should reduce baking powder by ¼ tsp, increase the hot liquid by 2 tbsp, and raise the oven temperature to 365°F (185°C). Nutritional and allergen information depends on the specific cocoa, flour blend, and frosting used; verify labels if you are baking for someone with a dairy, egg, or gluten restriction.