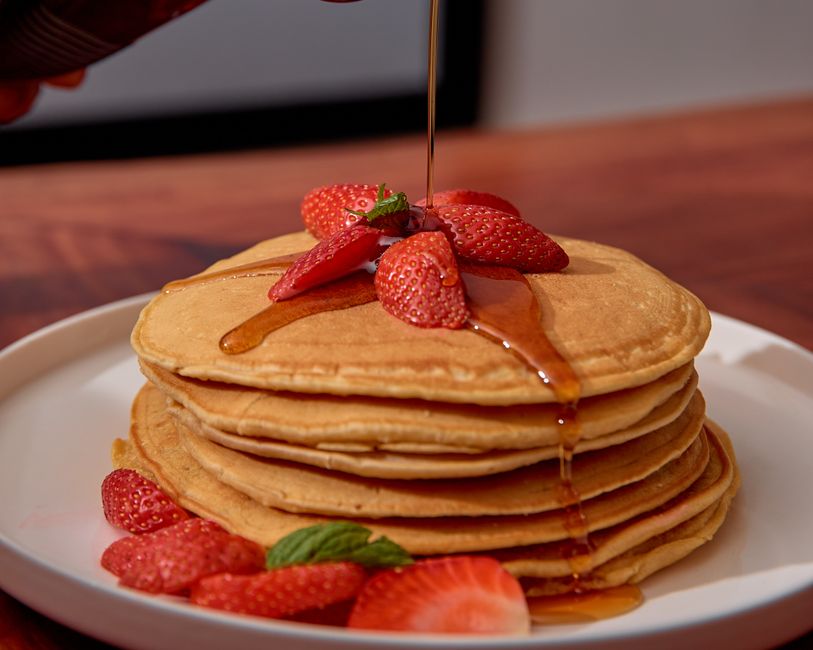
No boxed mix, no guesswork. This is the technique-driven method professional breakfast cooks use — built on a single flour-to-liquid ratio, a 10-minute rest, and a surface temperature you can actually measure.
Whisk 120 g (1 cup) all-purpose flour, 12 g (1 tbsp) sugar, 9 g (2 tsp) baking powder, and 3 g (½ tsp) fine salt in one bowl. In a second bowl, combine 240 g (1 cup) buttermilk, 1 large egg (50 g), and 28 g (2 tbsp) melted butter. Pour wet into dry and fold with 12–15 strokes — stop while lumps remain. Rest the batter 10 minutes. Cook on a surface held at 350°F (175°C), about 2–3 minutes per side, flipping once when the bubbles break and stay open. Yield: eight 4-inch pancakes.
- The master ratio that makes pancakes work
- What each ingredient is actually doing
- Equipment: what matters and what doesn’t
- The step-by-step master method
- Why the 10-minute rest is not optional
- Cooking: living inside the 350°F window
- Troubleshooting every failure mode
- Variations and substitutions
- Storage, freezing, and reheating
- Pancake FAQ
The Master Ratio That Makes Pancakes Work
Every reliable pancake recipe is a variation on one proportion: roughly equal weights of flour and liquid, leavened at about 7.5% of the flour weight, sweetened lightly, and bound with one egg per cup of flour. Lock that skeleton in and you can scale from four pancakes to forty without touching a recipe card.
| Component | Weight | Volume | Function |
|---|---|---|---|
| All-purpose flour | 120 g | 1 cup, spooned & leveled | Structure, starch for browning |
| Granulated sugar | 12 g | 1 tbsp | Maillard browning, tenderness |
| Baking powder | 9 g | 2 tsp | Primary lift |
| Fine salt | 3 g | ½ tsp | Flavor balance, gluten tightening |
| Buttermilk | 240 g | 1 cup | Acid for leavening, fat, tang |
| Large egg | 50 g | 1 egg | Binding, richness, structure |
| Melted butter | 28 g | 2 tbsp | Tenderness, flavor, edge crisping |
That formula yields eight 4-inch pancakes from a scant ¼-cup (60 ml) pour each. Note the flour-to-liquid ratio sits at 1:2 by weight; once you go past 1:2.3 the batter can no longer hold its structure and pancakes spread thin and gummy regardless of how good your leavening is.
What Each Ingredient Is Actually Doing
Flour: the structural skeleton, and the biggest variable
All-purpose flour at 10.5–11.5% protein builds just enough gluten to hold gas bubbles without turning rubbery. The problem is measurement: a cup of flour scooped directly from the bag can weigh 150 g, a 25% overshoot that turns a light pancake into a hockey puck. Spoon flour into the cup and sweep level, or better, weigh it.
Baking powder: two-stage lift
Double-acting baking powder releases gas twice — once when it hits liquid at room temperature, and again when the batter passes roughly 140°F (60°C) on the griddle. That second stage is what creates the final lift during cooking, which is why an over-rested batter that has already exhausted its first reaction still puffs, but never as high.
Buttermilk: acid plus fat plus flavor
True cultured buttermilk brings lactic acid, which reacts with the alkaline baking powder to drive leavening, and adds a tang that balances the sugar. Its thickness also holds the batter together. If you substitute plain milk, you lose both the acid and the viscosity.
Stir 1 tablespoon (15 ml) fresh lemon juice or white vinegar into 1 cup (240 ml) whole milk and let it stand 10 minutes until visibly thickened and slightly curdled. The acid level lands close enough to cultured buttermilk for leavening purposes. Do not use skim milk — the missing fat shows up immediately in the texture.
Egg: binder and emulsifier
One large egg per cup of flour contributes about 50 g of water, 6 g of protein, and 5 g of fat. It binds the batter and emulsifies the melted butter into the liquid so the fat distributes evenly instead of pooling on the surface.
Fat: butter in the batter, fat on the pan
Melted butter inside the batter tenderizes by coating flour proteins and limiting gluten formation. On the cooking surface, use a thin film of neutral oil or clarified butter — whole butter’s milk solids scorch at around 300°F, right in the middle of your cooking window.
Sugar and salt: small amounts, outsized jobs
Sugar does more than sweeten; it feeds the Maillard reaction that produces the golden-brown crust. Salt at 0.5 tsp per cup of flour is below the threshold where you’d taste it as saltiness, but below that level, pancakes taste distinctly flat.
Equipment: What Matters and What Doesn’t
Pancakes are not gear-dependent, but three pieces of equipment change results measurably.
What doesn’t matter: nonstick versus stainless (both work with adequate fat), sifting the flour (a whisk does the same job in five seconds), and resting the batter in the refrigerator versus on the counter, provided the room isn’t above 80°F.
The Step-by-Step Master Method
Why the 10-Minute Rest Is Not Optional
During the first ten minutes, flour particles absorb free water and the batter thickens by roughly 15–20%. Gluten strands that formed during mixing relax, which is why rested batter spreads less aggressively and produces a rounder, taller pancake. The first carbon-dioxide release from the baking powder distributes through the batter rather than escaping at the surface.
Past 30 minutes, the second-stage leavening capacity drops, the gluten re-tightens into a slack, elastic batter, and pancakes come out flatter and chewier. If you need to hold batter longer, refrigerate it (which slows the reaction) and use it within 12 hours.
A useful visual test: dip a spoon into freshly mixed batter and let it drip back. Immediately, it runs off in a thin, continuous ribbon. After ten minutes, it falls in a slow, heavy dollop. That viscosity shift is the hydration and gluten relaxation working in your favor.
Cooking: Living Inside the 350°F Window
Griddle temperature is the variable most home cooks never measure, and it explains almost every pancake failure. The workable window is narrow: about 325–375°F (163–190°C).
Edges set and darken before the center gelatinizes. You get a burnt ring, a raw, gluey middle, and a pancake that collapses when you press it. Butter milk solids scorch instantly.
The batter spreads wide before the structure sets, so pancakes turn out thin and pale. Extended cook time dries the interior and evaporates the leavening gas before it can lift.
Thermometer: 350°F at the center of the pan. Most reliable.
Water test: a few drops should skitter, bead, and vanish in about 2 seconds. Faster than that means too hot.
Test pancake: pour a 2-inch round. It should be ready to flip in 2–3 minutes with an even golden-brown surface. Adjust the burner by ¼ turn and re-test.
Between batches, wipe the pan with a lightly oiled paper towel. Residual crumbs burn and leave bitter flecks on the next batch, and a dry pan over porridge-high heat will develop hot spots that show up as uneven browning.
Troubleshooting Every Failure Mode
| Symptom | Root Cause | Fix |
|---|---|---|
| Flat, dense, no rise | Baking powder older than 6 months, or overmixing developed gluten | Test powder: 1 tsp in hot water should foam vigorously. Fold 12–15 strokes max. |
| Rubbery, tough | Excess gluten from overmixing or high-protein flour | Switch to all-purpose or cake flour blend; stop folding while lumps remain |
| Burned outside, raw center | Griddle above 400°F | Drop heat, wait 3 minutes for the pan to equalize, re-test with water |
| Pale, anemic color | Griddle below 325°F or too little sugar | Raise heat; confirm 1 tbsp sugar per 120 g flour |
| Gummy, wet interior | Too much liquid, or undercooked through the center | Weigh the buttermilk; extend second side by 30–60 seconds |
| Spreading too wide | Batter not rested, or liquid above 1:2.3 ratio | Rest 10 minutes minimum; reduce buttermilk by 15 ml |
| Tunnels and large holes | Leavening clumped, or baking soda overused | Whisk dry ingredients for 20 seconds before adding liquid |
| Sticking to the pan | Insufficient fat, or flipping before the crust sets | Thin oil film between batches; wait for matte edges |
Food Safety Notes That Matter Here
Variations and Substitutions
| Swap | Adjustment | Expected Result |
|---|---|---|
| Milk + 1 tbsp lemon juice | Replace buttermilk 1:1 after 10 min rest | Very close match; slightly less tang |
| Plain milk, no acid | Keep baking powder at 2 tsp; do not swap to baking soda | Milder flavor, marginally less lift |
| Whole wheat flour | Replace 50% of the AP flour; add 15 g extra buttermilk | Nuttier, denser; all-whole-wheat turns heavy |
| Gluten-free 1:1 blend | Add ½ tsp xanthan gum if the blend lacks it; rest 20 min | Good lift, slightly more fragile structure |
| Baking soda instead of powder | Use ½ tsp soda per 1 cup buttermilk, plus 1 tsp powder for lift | Works only with an acidic liquid; skip with plain milk |
| Vegan: oat milk + flax egg | 1 tbsp ground flax + 3 tbsp water per egg; add 1 tsp oil | Slightly chewier crumb, good browning |
Adding blueberries, chocolate chips, or chopped nuts? Scatter them onto the wet side of the pancake after pouring, not into the batter. Stirring inclusions through the batter breaks the structure you just built and causes streaking.
Storage, Freezing, and Reheating
Pancake FAQ
Can I make the batter the night before?
You can, but with a caveat. Cover and refrigerate the batter for up to 12 hours. Because refrigeration slows the double-acting baking powder’s first reaction, much of the leavening potential survives until the batter hits the hot pan. Expect pancakes that are slightly flatter and a touch tangier — the acid continues working on the flour overnight. For best results, mix the dry and wet components separately the night before and combine them in the morning.
Why are my pancakes flat even with fresh baking powder?
Three culprits, in order of likelihood. First, overmixing — every extra stroke past 15 develops gluten that fights the gas bubbles. Second, flour measured by volume and packed too densely, which effectively reduces the liquid-to-flour ratio. Third, a griddle that’s too cool: below 325°F the leavening gas escapes before the structure sets. Fix all three by weighing flour, folding minimally, and confirming surface temperature.
How do I know exactly when to flip?
Look for three simultaneous signals: bubbles rise to the surface, pop, and leave open craters that don’t close back over; the outer ½-inch of the pancake turns matte instead of glossy; and the underside releases from the pan without resistance when you slide a spatula under it. If the pancake is still stuck at the edges, it isn’t ready. At 350°F, that moment lands at roughly 2 to 3 minutes for a ¼-cup portion.
Baking powder or baking soda — which should I use?
Baking powder is the default because it contains both an acid and a base, so it works with any liquid. Baking soda is a pure base and needs an acid partner: it only functions in this recipe if you’re using buttermilk or acidulated milk. The practical conversion: ½ tsp baking soda replaces about 2 tsp baking powder in an acidic batter, but the browning and flavor change noticeably. For plain milk, use baking powder only.
Do I really need to rest the batter?
Yes, if you want a tall, tender pancake. Ten minutes allows flour particles to fully hydrate, relaxes the gluten network, and disperses the first wave of carbon dioxide evenly through the batter. Skipping it produces pancakes that spread wider, cook flatter, and taste slightly raw at the center. The rest costs you nothing but patience.
Can I make pancakes without eggs?
Yes. Replace each egg with 1 tablespoon ground flaxseed mixed into 3 tablespoons water and rested 5 minutes until gel-like, or use ¼ cup unsweetened applesauce. Add 1 extra teaspoon of neutral oil to compensate for the fat the yolk would have contributed. Expect slightly less structure and a softer crumb, but the leavening still works normally.
Why do my pancakes taste bitter or soapy?
Almost always excess leavening. More than 2 tsp of baking powder per 120 g of flour leaves unreacted alkaline residue that reads as a soapy, metallic tang. It’s also a sign the dry ingredients weren’t whisked thoroughly and you bit into a clump of baking powder. Whisk the dry blend for 20 seconds and measure the leavening by weight if you can.
How do I keep a whole batch warm without making them soggy?
Set your oven to 200°F (95°C) and place a wire rack on a sheet pan inside. Pancakes held on the rack stay crisp underneath because steam escapes downward. Stacks on a covered plate trap that steam and turn the crust soft within five minutes. If you must stack, place a folded paper towel between each pancake to wick moisture.
- Use one ratio: 120 g flour, 240 g liquid, 1 egg, 9 g baking powder, 12 g sugar, 3 g salt, 28 g butter.
- Weigh the flour. Volume-scooped flour can overshoot by 25% and ruins texture before you’ve cooked anything.
- Fold 12–15 strokes and stop with lumps intact — overmixing is the leading cause of tough pancakes.
- Rest the batter 10 minutes to hydrate the flour and relax the gluten; don’t go past 30 minutes.
- Cook at 350°F (175°C) surface temperature, verified with an infrared thermometer or the water-bead test.
- Flip once when bubbles break and stay open; hold finished pancakes on a rack at 200°F, never in a covered stack.
- U.S. Department of Agriculture, Food Safety and Inspection Service. “Shell Eggs From Farm to Table.” Guidance on cooking egg-containing dishes to 160°F (71°C).
- FoodSafety.gov (USDA/FDA). “Refrigerator & Freezer Storage Chart.” Cold-holding limits for cooked foods and leftovers.
- U.S. Department of Agriculture, Food Safety and Inspection Service. “Danger Zone (40 °F – 140 °F).” Time and temperature limits for perishable food.
- McGee, Harold. On Food and Cooking: The Science and Lore of the Kitchen. Revised ed., Scribner, 2004. Chapters on gluten development in batters and chemical leavening agents.
- U.S. Food and Drug Administration. “Don’t Eat Raw Dough — Raw Flour Can Make You Sick.” Pathogen risk in uncooked flour and batters.
- Cereal Chemistry / Journal of Cereal Science — published research on batter resting time, hydration, and viscosity development in wheat-flour systems.