A tangy, roasted pork chile verde that tastes like it simmered for four hours — because pressure cooking does in 25 minutes what a stovetop needs 180 minutes to accomplish.
Broil 1½ lb husked tomatillos with 8 oz mixed green chiles, half an onion, and 5 garlic cloves under high heat for 8–12 minutes until blackened in spots. Blend into a coarse salsa verde. Salt 3 lb of pork shoulder cubes (1½-inch) with 4½ tsp kosher salt, brown them on Sauté in two batches, bloom cumin and Mexican oregano in the rendered fat, then add the salsa, 1 cup chicken stock, and 1 tbsp fish sauce. Cook at High pressure for 25 minutes, natural release 10 minutes, then quick release. Thicken with a masa harina slurry on Sauté and finish off-heat with lime juice and cilantro. Total: about 75 minutes.
Flavor Profile and Borderlands Origin
Chili verde is not a tomato dish with green peppers stirred in. It is a fundamentally different architecture from Texas red: where a bowl of chili colorado leans on dried ancho and guajillo pods for sweetness and body, chile verde builds its entire structure on Physalis philadelphica — the tomatillo — plus roasted green chiles and slow-collapsed pork shoulder. The result is tart first, roasted second, and only then hot, with a bright vegetal edge that cutting acidity keeps from ever tasting heavy.
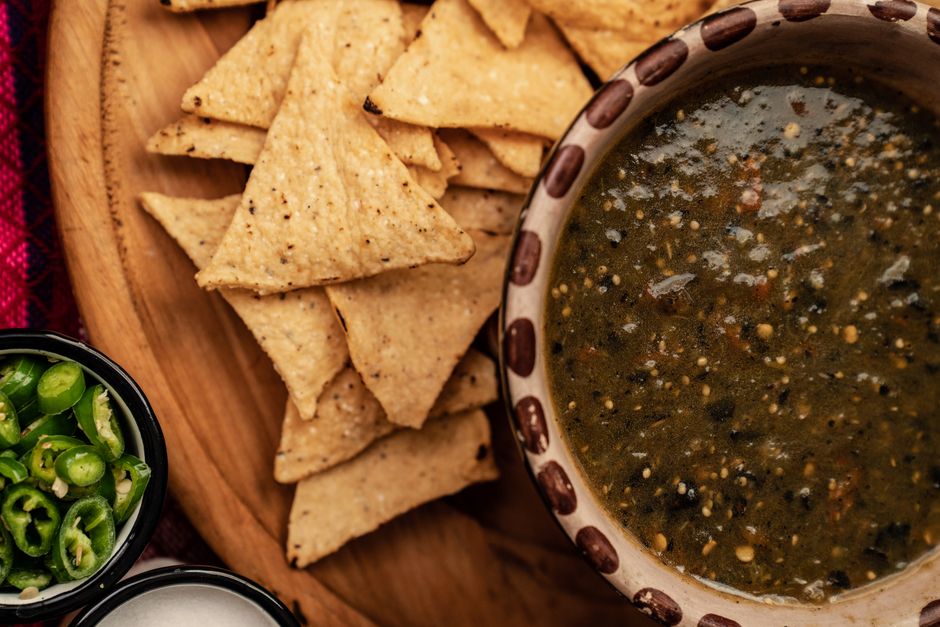
The dish sits in a genuinely binational foodway. Pork simmered in salsa verde appears across Jalisco and the Bajío as chile verde, while the American Southwest — particularly New Mexico’s Hatch Valley and Colorado’s Pueblo and Denver corridors — developed its own punchier green chile culture built around roasted Anaheim-type pods. Colorado’s signature version is often served as a smothered plate over burritos; New Mexico’s is thinner and more broth-like. The Instant Pot version you’re making here lands closer to the Colorado style: thick enough to hold a tortilla chip.
An Instant Pot running at High pressure holds roughly 15 psi, which pushes the boiling point of water to about 250°F / 121°C. That matters because pork shoulder’s connective tissue — roughly 4–6% of its total weight — is collagen, a triple-helix protein that hydrolyzes into gelatin only when held above roughly 160°F for an extended window. At a stovetop simmer of 200°F, that conversion takes 2½ to 3 hours. At 250°F, the same reaction completes in about 25 minutes.[3]
The trade-off is that pressure cooking gives you almost no evaporative concentration. That’s why this recipe uses a relatively small liquid load (1 cup stock, plus the water the tomatillos release) and finishes with a slurry rather than a long uncovered reduction.
“Chile verde is a sauce that happens to contain pork, not a pork dish that happens to have sauce.”
— The guiding principle for balancing this recipe
Flavor targets to aim for in the finished pot: a tomatillo tang that makes the back of your jaw tighten slightly, a smoky-roasted top note from the broiler char, earthy cumin that sits underneath rather than on top, and a heat that arrives late and lingers. If your pot tastes flat, the fix is almost always acid, not salt.
Ingredient Selection and Green-Sauce Science
Pork shoulder is non-negotiable
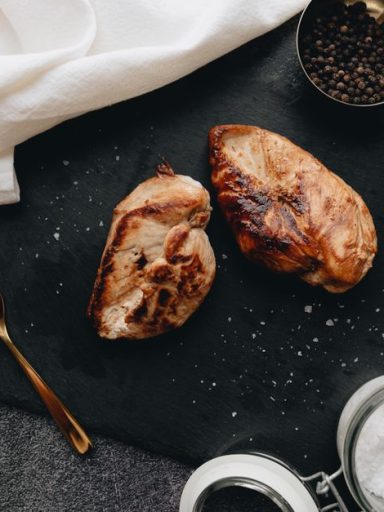
Buy 3 lb of pork shoulder — sold as Boston butt or pork butt in most American markets (the name refers to the cut’s shipping barrel, not its anatomical location). It carries the fat marbling and collagen density this method needs. Pork loin and tenderloin are the wrong choice: they contain roughly a third of the collagen and will emerge from 25 minutes at 250°F chalky and shredded into dry fibers. Butcher it yourself into 1½-inch cubes, trimming only the thickest exterior fat caps. Leave the intramuscular fat alone; it’s what lubricates the finished stew.
Tomatillos: husk, rinse, then char
Tomatillos arrive wrapped in a papery husk and coated in a sticky, slightly bitter resin that is mostly pectin and plant sterols. Peel the husks and rinse under warm water with a little friction — cold water alone leaves the residue tacky. They are low in sugar and high in citric and malic acid, which is why they read as bright rather than sweet compared to red tomatoes.[6]
Broiling matters more than most recipes admit. Direct high heat blisters the skin and drives Maillard and caramelization reactions on the exposed surfaces, converting some of that harsh raw acidity into rounder roasted notes. Skip the broiler and your chili verde tastes raw and thin no matter how long it pressure cooks.
Building the green chile blend
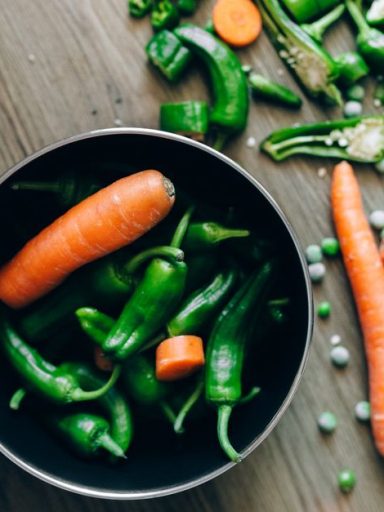
Use 8 oz of whole pods, mixed for layered heat rather than a single flat burn. Scoville ranges below are the standard cultivar values published by New Mexico State University’s Chile Pepper Institute.[5]
| Chile | Scoville (SHU) | Flavor Role |
|---|---|---|
| Hatch / Anaheim | 1,000–2,500 | Backbone roasted green flavor; use 4–5 pods |
| Poblano | 1,000–2,000 | Deep, almost raisiny earthiness; 2 pods |
| Jalapeño | 2,500–8,000 | Clean mid-palate heat; 2 pods |
| Serrano | 10,000–23,000 | Sharp finish; 1 pod, optional |
Leave the seeds and pith in for a genuinely spicy pot; scrape them out entirely for a mild one. Note that capsaicin is fat-soluble and heat-stable — pressure cooking will not mellow the heat you put in, so calibrate at the blender, not after.
Fish sauce (1 tbsp): Tomatillos bring acid but almost no glutamates. A tablespoon of fish sauce or soy sauce adds free glutamic acid that reads as savory depth without tasting fishy after 25 minutes under pressure.
Masa harina (2 tbsp): A slurry of masa harina and water thickens the braise and contributes the nixtamalized corn aroma that makes the finished bowl taste like it came off a taqueria line rather than a home kitchen.
The supporting cast
- White onion, ½ large — broiled with the tomatillos, not sautéed separately; raw onion added pre-pressure turns acrid
- Garlic, 5 cloves — whole and unpeeled under the broiler, then squeezed from skins for a sweeter, less aggressive allium note
- Cumin, 1 tsp ground — bloomed in pork fat for 30 seconds; unbloomed cumin tastes dusty
- Mexican oregano, 1 tsp — distinctly different from Mediterranean oregano, with citrus and bay-like notes
- Bay leaf, 1
- Chicken stock, 1 cup — the pressure cooker’s minimum liquid requirement
- Lime, 1–2 — juice only, added off-heat
- Cilantro, 1 bunch — stems blended into the sauce, leaves stirred in at the end
Prep and Equipment Overview
This is a one-pot recipe with one sheet pan and one blender as supporting acts. Total active time is roughly 35 minutes, split between broiling, browning, and finishing.
Instant Pot’s published operating manual specifies a minimum of 1 cup of liquid for 3- and 6-quart models, and 1½ cups for 8-quart units, to build and maintain pressure safely. It also specifies a maximum fill line of ⅔ full for all foods that expand or foam during cooking, including braises and stews.[4] This recipe’s 1 cup of stock, combined with the water released by the broiled tomatillos, satisfies the minimum without diluting flavor.
One practical prep note: do all your knife work before you turn on the broiler. Broiling tomatillos takes 8–12 minutes of hands-off time, which is exactly enough to cube 3 lb of pork shoulder if you’ve already got your board set up. Sequencing those two tasks is what keeps this recipe under 80 minutes start to finish.
Step-by-Step Master Method
Chile verde served straight from the pot is good. Chile verde rested 20 minutes off heat, lid off, is better. During that rest the gelatin continues setting, the sauce thickens without any added starch, and the fat rises to a glossy surface layer you can either stir back in or skim off. If you have the time, make this the night before — it genuinely improves overnight.
Ratios, Pressure Timing, and Temperature Table
These are the numbers worth committing to memory. Everything scales linearly except the liquid floor, which does not.
| Variable | Target | Why It Matters |
|---|---|---|
| Pork to tomatillo ratio | 2 : 1 by weight (3 lb pork : 1½ lb tomatillos) | Below 2:1 the sauce overwhelms the meat; above 3:1 you’re making pork with green garnish |
| Chile load | 8 oz whole pods per 3 lb pork | Roughly 2.5 oz per pound; scale the heat blend, not just the total weight |
| Salt | 1½ tsp Diamond Crystal kosher per lb | If using Morton kosher, reduce by 25%; if fine table salt, reduce by 40% |
| Minimum liquid | 1 cup (6 qt) / 1½ cups (8 qt) | Pressure cooker requirement — not a flavor decision[4] |
| Cube size | 1½ inches | Smaller cubes shred into mush; larger ones need longer under pressure |
| High pressure time | 25 min (1½-inch cubes) / 35 min (2-inch cubes) | Add 5 minutes for every ½ inch over 1½ inches |
| Natural release | 10 minutes minimum | Prevents sauce eruption through the valve and lets residual heat finish the meat |
| Finished pork temp | 200–205°F | Collagen conversion threshold; USDA minimum for safety is 145°F[1] |
| Thickener | 2 tbsp masa harina + 3 tbsp water per 3 lb batch | Use 1 tbsp cornstarch + 2 tbsp water as a substitute |
Electric pressure cookers regulate by internal pressure, not by time, so they’re far less altitude-sensitive than stovetop models. However, above 3,000 feet you should still add roughly 5% to your pressure time, and above 5,000 feet, about 10%. At 5,000 feet that means 27–28 minutes instead of 25. This isn’t a safety issue with an electric cooker — it’s a texture issue driven by the lower boiling point of the liquid inside.
Common Mistakes and Fixes
Pork’s USDA safe minimum internal temperature is 145°F followed by a 3-minute rest, but this recipe deliberately cooks well past that to 200–205°F because collagen conversion — not pathogen destruction — is the goal.[1] Leftovers should be refrigerated within 2 hours of cooking and consumed within 3 to 4 days, or frozen for up to 3 to 4 months.[2]
Pairing, Storage, and Reheating
How to serve it
- Over cilantro-lime rice with the stew ladled on top and a spoonful of the fat-rich surface layer included
- As a smothered plate — ladle over a bean-and-cheese burrito and run it under the broiler for 90 seconds
- With corn tortillas warmed directly on a gas burner, plus raw white onion and more lime
- Under fried eggs the next morning, which is arguably the best use of leftovers
- Over chilaquiles in place of salsa roja for a heavier, meatier version
What to drink
The tomatillo’s citric acid cuts through fat, so you want something with complementary acidity rather than sweetness. A dry Riesling, a Txakoli, or a light-bodied lager all work. Avoid heavily oaked reds — tannin plus capsaicin amplifies the burn unpleasantly.
Storing and reheating
Cool the stew uncovered for 20 minutes before refrigerating; trapping steam in a sealed container creates condensation that thins the sauce. Store in an airtight container for 3 to 4 days.[2] The fat cap that forms on the surface is protective, so leave it in place until you reheat.
For freezing, portion into 2-cup containers and freeze up to 3 to 4 months.[2] Thaw overnight in the refrigerator rather than in the microwave — microwave defrosting heats unevenly and can toughen the pork.
Reheat gently on the stovetop over medium-low with a splash of stock or water, covered, for 8–10 minutes, stirring once or twice. Boiling reheated chile verde will tighten the muscle fibers and undo some of the work the pressure cooker did. If the sauce has thickened too much in the fridge, thin it with stock rather than water — you want to rebuild flavor, not just viscosity.
FAQ
Can I make Instant Pot chili verde with chicken instead of pork?
Yes, but the timing changes completely. Boneless skinless chicken thighs need only 10 minutes at High pressure with a 10-minute natural release. Chicken breast is a poor substitute — it has almost no collagen and will shred into dry strands. If you go with chicken thighs, reduce the salt to about 1 tsp per pound and expect a thinner sauce, since there’s no gelatin being released.
Do I have to broil the tomatillos, or can I just dump everything in the pot?
You can skip the broiler, and it will still be edible — but you’ll lose the roasted backbone that distinguishes chile verde from a plain tomatillo stew. A faster alternative if you don’t want to heat the oven: blister the tomatillos and chiles in a dry cast-iron skillet over high heat for 6–8 minutes, or char them directly under a gas broiler element on a foil-lined pan. Either way, get some black on them.
Why did my chili verde come out bitter?
Three usual suspects. First, unrinsed tomatillos — the sticky husk residue is mildly bitter and needs warm water and friction to remove. Second, badly scorched chile skins, where the black has gone past blistered into carbonized. Third, chile seeds that were broiled until black rather than just toasted. The fix for an already-bitter pot is a small amount of fat and acid: stir in a tablespoon of neutral oil and the juice of half a lime, then taste again.
How spicy is this recipe as written?
With four to five Hatch or Anaheim pods, two poblanos, two jalapeños, and one serrano — seeds in — you’re landing somewhere in the moderate-to-hot range, roughly comparable to a good taqueria salsa verde. For a mild version, use only Hatch and poblano and remove all seeds and pith. For a genuinely hot version, swap the Hatch for 4 oz of roasted Serrano plus one habanero. Remember that pressure cooking doesn’t reduce heat, so whatever you blend is what you serve.
Can I double this recipe?
You can scale the ingredients, but you must move to an 8-quart or larger pot. Doubling a 6-quart batch to 6 lb of pork plus 3 lb of tomatillos will blow past the ⅔ maximum fill line and risks blocking the pressure valve with foaming sauce. Pressure time stays at 25 minutes for a doubled batch — the pot doesn’t care about volume, only about cube size and the temperature it reaches.
What if I don’t have an Instant Pot — can I use a slow cooker?
Yes. Brown the pork on the stovetop in a Dutch oven first, then transfer everything to a slow cooker and cook on Low for 6 to 7 hours or High for 3½ to 4 hours. You’ll need less liquid — reduce the stock to ½ cup, since slow cookers don’t lose water the way a stovetop braise does. Thicken at the end the same way, on the stovetop if your slow cooker insert isn’t stovetop-safe.
Is chili verde the same thing as green chile stew?
They’re close relatives, not the same dish. Green chile stew — particularly the New Mexican version — is typically thinner, often includes potatoes, and is built on roasted Hatch chiles with a lighter pork presence. Chile verde is a sauce-forward braise where tomatillos do the structural work and the finished consistency is thick enough to cling to a tortilla. In Colorado, the lines blur considerably, and many restaurant versions sit between the two.
How do I keep the pork from shredding into mush?
Two levers: cube size and release method. Cut the pork into uniform 1½-inch cubes — uneven pieces mean the small ones disintegrate while the large ones stay tough. And never quick-release immediately after the cook. The 10-minute natural release lets the internal temperature fall gradually, which firms the meat slightly before you open the lid. If you want distinct chunks rather than a shredded texture, pull the meat out with a slotted spoon before thickening the sauce and return it afterward.
- Use 3 lb pork shoulder cut into 1½-inch cubes — loin lacks the collagen this method depends on.
- Broil the tomatillos and chiles until genuinely blackened in spots. That char is the flavor foundation, not an optional step.
- Cook at High pressure for 25 minutes with a full 10-minute natural release; quick-releasing a thick braise sprays sauce through the valve.
- Target 200–205°F on an instant-read thermometer — well past the 145°F USDA safety minimum, because collagen conversion needs the higher temperature.[1]
- Add lime juice and cilantro leaves only after the pot is off. Both are destroyed by heat.
- Pressure cooking concentrates nothing, so thicken with a masa harina slurry on Sauté rather than hoping for evaporation.
- USDA Food Safety and Inspection Service. “Safe Minimum Internal Temperature Chart.” fsis.usda.gov
- USDA Food Safety and Inspection Service. “Leftovers and Food Safety.” fsis.usda.gov
- McGee, Harold. On Food and Cooking: The Science and Lore of the Kitchen, revised edition. Scribner, 2004. (Collagen hydrolysis and gelatin conversion in braised meats.)
- Instant Pot. Duo Series User Manual — minimum liquid requirements and maximum fill line specifications by model size.
- New Mexico State University, Chile Pepper Institute. Published Scoville heat unit ranges for Capsicum annuum cultivars including Hatch/Anaheim, poblano, jalapeño, and serrano.
- USDA FoodData Central. “Tomatillos, raw.” Nutrient and organic acid composition data. fdc.nal.usda.gov