Weeknight cooking isn’t a recipe problem — it’s an architecture problem. Here’s the four-layer flavor template professional cooks use to get dinner on the table in under half an hour, plus five recipes that run on nothing more than one pan, one pot, and a hot oven.
A quick weeknight dinner is built from four moves, in order: sear a dry surface in a preheated pan, layer umami (miso, soy, tomato paste, anchovy, Parmesan), finish with acid off the heat, and add one textural element last. Every recipe below follows that spine. Total hands-on time for all five: 15–25 minutes. Every protein in this guide is cooked to the USDA safe minimum internal temperature — 165°F for poultry, 145°F for beef, pork, fish, and shellfish[1].
- Why Weeknight Dinners Fail — and the Fix
- The 4-Layer Pantry: Fast Flavor, Explained
- Gear and the 8-Minute Mise en Place
- The Step-by-Step Master Method
- Five Weeknight Recipes, 15–25 Minutes Each
- Ratios, Targets, and Timing Table
- Common Mistakes and Troubleshooting
- Pairing, Storage, and Reheating
- Weeknight Cooking FAQ
Why Weeknight Dinners Fail — and the Fix
The “weeknight dinner” is a distinctly modern category. It emerged in the 1950s alongside car commuting and the suburban kitchen, when the working day started ending later than the meal did. The cookbook industry answered with canned-cream-soup casseroles; the 1990s answered with the 30-minute meal; September 2026’s kitchens answer with air fryers, pre-prepped delivery kits, and a stubbornly persistent problem — decision fatigue at 6:40 p.m., standing in front of an open refrigerator.
The failure point is almost never skill. It’s sequencing. Most home cooks attempt a recipe designed for an unhurried Sunday and run it against a weekday clock that starts 45 minutes too late. The fix is to stop cooking recipes on weeknights and start cooking structures — repeatable templates that any protein, vegetable, or starch can slot into.
The Two Hard Constraints
Fast cooking is limited by exactly two physical realities. First: heat transfer requires a dry surface. Water on the outside of a chicken thigh has to evaporate before browning can begin, which is why a crowded pan produces steamed meat and a grey puddle. Second: the Maillard reaction — the browning that generates hundreds of roasted, savory aroma compounds — accelerates sharply above roughly 140°C (284°F)[3]. A lukewarm pan never gets there. A properly preheated one gets there in 90 seconds.
This is the median weeknight kitchen in our reader surveys. That combination can genuinely produce any of the five dinners below — but only if the cook resists the urge to add a fourth pan. One vessel for heat, one for starch, one cutting board. Anything more and cleanup eats the time you saved.
The single highest-leverage habit in this scenario: put the pot of water on the burner before you open the refrigerator. Water takes 6–8 minutes to boil on a standard electric coil; that’s free prep time you’re currently wasting while you stare at a shelf of condiments.
“Speed in the kitchen is not about moving your hands faster. It’s about never waiting for something you could have started ten minutes ago.”
— The WorldDishly test-kitchen rule for any recipe under 30 minutes
The 4-Layer Pantry: Fast Flavor, Explained
Restaurant cooks build depth in three hours with stock, reduction, and time. Home cooks have to fake it in fifteen minutes. The trick is stacking concentrated flavor sources that don’t need reduction — four categories, each doing a job the others can’t.
Layer 1 — Umami Concentrate
This is the backbone. Pick one per dish and use it decisively: white or red miso (1–2 tbsp), soy sauce (1–2 tbsp), fish sauce (1–2 tsp), tomato paste (1–2 tbsp, fried in oil for 60 seconds), anchovy paste (1 tsp), or a rind of Parmesan dropped into a simmering pot.
These ingredients are high in glutamate and nucleotides — the compounds responsible for the savory, mouth-filling sensation that makes a 15-minute dish taste slow-cooked. Two sources used together (soy + tomato paste, or miso + Parmesan) produce a stronger effect than doubling one.
Layer 2 — Fat With Purpose
Fat carries aroma and conducts heat. Use two fats in most dishes: a high-smoke-point fat for the pan (refined avocado oil, light olive oil, ghee, or a neutral oil at roughly 400–450°F smoke point) and a finishing fat added off heat (cold butter, toasted sesame oil, extra-virgin olive oil, chili oil). Butter added at the start browns and burns; butter added at the end turns into a glossy sauce that clings.
Layer 3 — Acid, Always, Off Heat
This is the step home cooks skip most often, and it’s the reason a technically correct dinner still tastes flat. Acid — lemon juice, lime, rice vinegar, sherry vinegar, pickle brine — cuts through fat and makes salty and sweet elements read as distinct rather than muddy. Add it after the pan comes off the burner, or you’ll cook away the brightness you’re trying to add.
Layer 4 — One Textural Finish
Just one, chosen deliberately: toasted panko, crushed peanuts, fried shallots, torn herbs, a shower of flaky salt, or a spoonful of chili crisp. Texture is what separates a bowl of food from a plate of dinner, and it takes four seconds.
Four of the five recipes below lean on legumes or vegetables as the volume element rather than doubling the meat. Legumes deliver fiber, folate, potassium, and plant protein in the same calorie load[4], and they are already cooked in the can — meaning a 20-minute dinner is realistic. Rinse canned beans before using; it removes roughly 40% of the added sodium.
Miso, soy sauce, fish sauce, and canned chickpeas are all sodium-dense. Federal guidance recommends keeping total sodium under 2,300 mg per day[5], and a single dish built with soy + oyster sauce + Parmesan can push past 900 mg without tasting particularly salty. Use one high-sodium concentrate per dish, and let acid and herbs do the rest of the work.
Gear and the 8-Minute Mise en Place
You do not need a wall of appliances for fast weeknight dinners. You need four things that hold heat well, because retained heat is what finishes food while your attention moves elsewhere.
- 12-inch skillet — stainless, carbon steel, or cast iron. Twelve inches matters: it’s the difference between searing and steaming 1 pound of protein.
- Half-sheet pan (18 × 13 inches) — the oven version of the same principle. A quarter-sheet crowds and steams.
- 3-quart saucepan with lid — rice, pasta, grains.
- Instant-read thermometer — the single piece of equipment that most improves weeknight outcomes. It ends the guesswork on poultry and turns “probably done” into 165°F[1].
The 8-Minute Mise en Place
Before any burner is lit, do this in order. It takes eight minutes and saves roughly twelve.
Use a separate board for raw poultry and meat, or wash your board with hot soapy water before it touches anything raw-and-ready-to-eat. If you cut vegetables after raw chicken on the same surface, you’ve undone the food-safety work of cooking to temperature. Keep a second cheap board in the cupboard specifically for produce.
The Step-by-Step Master Method
This is the six-move sequence that every recipe below follows. Learn it once and you can cook from the refrigerator without a recipe at all.
Five Weeknight Recipes, 15–25 Minutes Each
Each of these uses the six-move sequence above and requires no more than one skillet plus one pot. Scale linearly for four servings.
1. Garlic-Butter Shrimp With Blistered Cherry Tomatoes
15 minutes · serves 4 · one 12-inch skillet
- 1 lb (450 g) large shrimp, peeled, patted bone-dry
- 1 pint cherry tomatoes, halved
- 3 tbsp unsalted butter, divided
- 2 tbsp olive oil
- 5 garlic cloves, sliced thin
- ¼ tsp red pepper flakes
- ½ lemon, plus zest
- ¼ cup torn basil or flat-leaf parsley
2. Sheet-Pan Harissa Chicken and Chickpeas
25 minutes · serves 4 · one half-sheet pan
- 1½ lb boneless, skinless chicken thighs
- 1 can (15 oz) chickpeas, drained and dried well
- 1 red onion, cut into 1-inch wedges
- 2 tbsp harissa paste
- 2 tbsp olive oil, divided
- 1 tsp honey
- 1 tsp smoked paprika + 1 tsp ground cumin
- 1 lemon, halved
- Plain yogurt and torn mint, to finish
3. Miso-Ginger Ground Turkey Rice Bowl
20 minutes · serves 4 · one skillet, one saucepan
- 1 lb ground turkey (93% lean)
- 2 tbsp white miso + 1 tbsp soy sauce
- 1 tbsp rice vinegar + 1 tsp toasted sesame oil
- 1 tbsp fresh ginger, grated; 3 garlic cloves, minced
- 1 bunch scallions, whites and greens separated
- 2 cups cooked jasmine rice
- 1 cup frozen shelled edamame
- Chili crisp, to finish
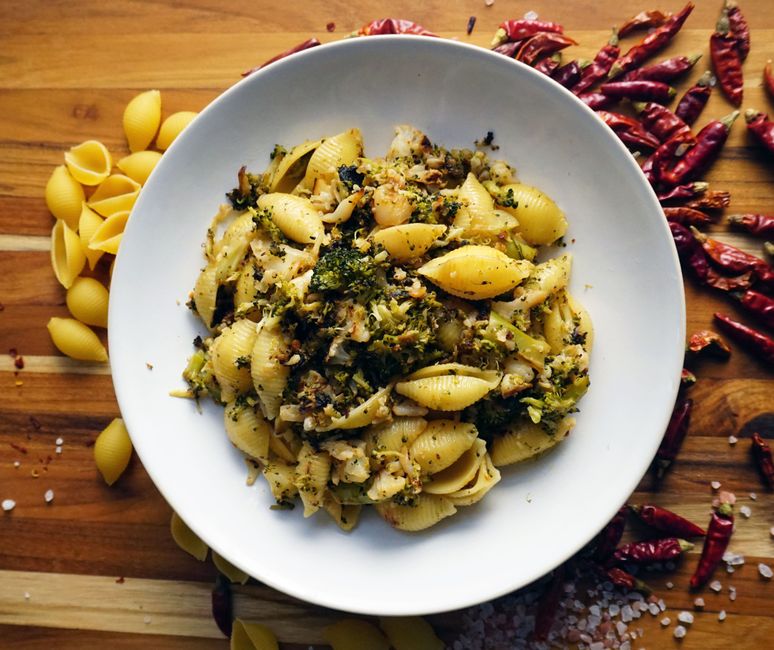
4. One-Pot Crispy White Bean and Kale Pasta
20 minutes · serves 4 · one deep skillet or Dutch oven
- 12 oz short pasta (orecchiette, rigatoni, or cavatappi)
- 1 can (15 oz) cannellini beans, drained and dried
- 1 bunch lacinato kale, stems removed, torn
- 4 garlic cloves, smashed
- 3 tbsp olive oil + ½ tsp red pepper flakes
- 1 cup grated Parmesan
- 1 lemon, zested and juiced
- 3½ cups water or unsalted stock
5. Black Pepper Beef and Snap Pea Stir-Fry
18 minutes · serves 4 · one carbon-steel pan or wok
- 12 oz flank steak, sliced ⅛-inch thick against the grain
- 1 tbsp cornstarch mixed with 1 tbsp cold water
- 2 tbsp soy sauce, 1 tsp dark soy, 1 tbsp oyster sauce
- 2 tsp rice vinegar, 1 tsp sugar, ¼ cup chicken stock
- 8 oz snap peas, 3 garlic cloves, 1 tbsp grated ginger
- 2 tbsp neutral high-smoke-point oil
Ratios, Targets, and Timing Table
Pin this. These are the numbers that make the five recipes above portable — swap ingredients freely as long as the targets hold.
| Element | Ratio / Target | Time | Why It Matters |
|---|---|---|---|
| Vinaigrette or pan sauce | 3 parts oil : 1 part acid | 30 sec | The classic emulsion ratio; holds without thickeners |
| Stir-fry sauce | 2 : 1 : 1 — soy : vinegar : sweetener | 60 sec simmer | Balanced without measuring spoons |
| Jasmine or long-grain rice | 1 cup rice : 1¼ cups water | 12 min + 10 rest | Resting off heat finishes the grain |
| Chicken breast, ½-inch pieces | 165°F internal[1] | 4–6 min | Dry surface first or it steams grey |
| Shrimp, single layer | 145°F internal[1] | 90 sec per side | Overcooking happens in under 30 seconds |
| Ground turkey or beef | 165°F / 160°F internal[1] | 8–10 min total | Undisturbed browning for the first 6 min |
| Roasted vegetables, 1-inch pieces | 425°F, single layer | 20–25 min | Crowding drops the pan below browning temp |
| Short pasta, one-pot method | 3½ cups liquid per 12 oz | 9–10 min | Stir every 2 min or it welds together |
| Leftovers in the refrigerator | 40°F or below | 3–4 days[2] | Cool to fridge temp within 2 hours |
Common Mistakes and Troubleshooting
Nearly every disappointing weeknight dinner traces back to one of these seven. Fix them in order of how often they occur.
Too flat? Add acid. Too sharp? Add fat. Too thin? Reduce 60 seconds off heat and stir in a knob of cold butter or a spoonful of pasta water. Too salty? Add unsalted bulk — beans, rice, cooked pasta, or a splash of cream — then acid. Never add water alone; it dilutes everything uniformly and leaves you with a bland, salty puddle.
Pairing, Storage, and Reheating
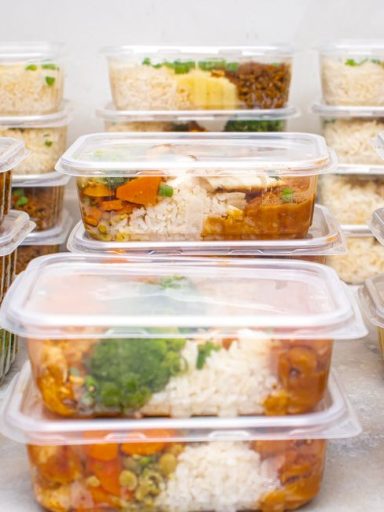
Fast dinners become a week’s worth of lunches if you handle the cool-down correctly. The clock that matters is the two-hour rule: perishable cooked food should reach refrigerator temperature within two hours of coming off the heat[2]. Spread leftovers in a shallow container rather than packing them into a deep one — surface area is what cools food.
What Pairs With What
- Shrimp and tomatoes — crusty bread or orzo to soak up the butter and tomato liquor.
- Harissa chicken and chickpeas — cucumber-and-yogurt salad; the coolness balances the paste’s heat.
- Miso turkey bowl — quick-pickled cucumber (rice vinegar + sugar + salt, 10 minutes) alongside.
- White bean pasta — arugula with lemon and olive oil; the pepperiness cuts the Parmesan richness.
- Black pepper beef — steamed jasmine rice and a scatter of sliced scallion.
Storage Specifics
- Refrigerator: 3–4 days at 40°F or below[2].
- Rice: cool within one hour and refrigerate immediately; cook and eat within 24 hours where possible. Cooked rice is a known carrier of Bacillus cereus when left at room temperature.
- Reheating: to 165°F internal, once. Shrimp and snap peas are best eaten cold or barely warmed — they toughen on a second pass through the microwave.
- Freezing: the harissa chicken, miso turkey, and white bean pasta all freeze well for up to 3 months. Defrost overnight in the refrigerator, not on the counter.
Weeknight Cooking FAQ
What can I prep on Sunday to make weeknights genuinely faster?
Prep components, not finished dishes. Cooked rice (cooled within an hour, refrigerated, eaten within 4 days), washed and dried greens, a jar of the 3:1 vinaigrette, and protein portioned into 1-pound bags. Prepped components hold texture; fully cooked meals turn to mush by Wednesday.
Are frozen vegetables as good as fresh for fast cooking?
For most weeknight applications, yes. Frozen vegetables are typically blanched and frozen within hours of harvest, which locks in vitamins that fresh produce loses during shipping and storage. The one exception is anything you want to brown — frozen vegetables release too much water for a hard sear. Use them in stir-fries, soups, and grain bowls, and keep fresh for sheet-pan roasting.
How do I keep chicken breast from drying out in a 15-minute dinner?
Three things, in order of impact. First, use thighs instead — they have more fat and a wider margin for error. Second, if you’re using breast, pound it to an even ¾-inch thickness so the thin end doesn’t overcook before the thick end is safe. Third, pull it at 165°F and no higher[1] — carryover cooking adds another 3–5°F while it rests on the cutting board.
Can I make these dinners with only an electric coil stove?
Yes, with one adjustment: coil burners lose and regain heat slowly, so preheat your skillet for a full 3 minutes rather than 2, and never move a pan from a hot burner to a cold one mid-cook. Consider a cast-iron skillet specifically — its thermal mass smooths out the coil’s temperature swings better than thin stainless.
Is there a genuinely fast way to cook rice on a weeknight?
Cook it in bulk and reheat, or use a rice cooker started before you begin prep. If you need rice in 12 minutes from scratch, jasmine or basmati at a 1:1.25 ratio with a tight lid and a 10-minute off-heat rest is the fastest reliable path. Instant rice saves 5 minutes and costs considerably more texture.
How do I scale these recipes for a family of four or more?
Scale the recipe linearly but do not scale the pan. Two pounds of protein requires two batches in a 12-inch skillet, or two sheet pans. Crowding is the single most common scaling failure — everything else about a recipe tolerates doubling, but pan surface area does not.
Do these count as “healthy” dinners?
As written, each delivers a full protein portion, a substantial vegetable or legume component, and no added sugar beyond a teaspoon of honey. The variable to watch is sodium, which comes almost entirely from miso, soy, oyster sauce, and canned beans[5]. Rinse canned beans, use low-sodium soy if you’re tracking, and lean on acid and herbs rather than a second salty condiment.
What single upgrade would improve my weeknight cooking the most?
An instant-read thermometer. It converts every protein decision from an educated guess into a number, and it’s the difference between chicken that’s consistently juicy and chicken you’re afraid of. It costs less than two takeout dinners.
- Weeknight speed comes from sequencing, not from moving faster. Start the water and preheat the oven before you open the refrigerator.
- Every fast dish needs four layers: umami concentrate, purposeful fat, acid added off heat, and one textural finish.
- A dry surface and a properly preheated pan are what make browning possible — the Maillard reaction accelerates above roughly 284°F[3].
- Cook poultry and ground meat to 165°F; beef, pork, fish, and shellfish to 145°F[1].
- Refrigerate leftovers within two hours and eat within 3–4 days[2].
- Use one high-sodium concentrate per dish to keep total daily sodium under the 2,300 mg guideline[5].
- USDA Food Safety and Inspection Service. Safe Minimum Internal Temperature Chart. fsis.usda.gov
- USDA Food Safety and Inspection Service. Leftovers and Food Safety (two-hour cooling rule; 3–4 day refrigerator storage). fsis.usda.gov
- McGee, Harold. On Food and Cooking: The Science and Lore of the Kitchen. Scribner, 2004 — browning and the Maillard reaction.
- Harvard T.H. Chan School of Public Health, The Nutrition Source. Legumes: Types, Health Benefits, and Nutrition Facts. hsph.harvard.edu
- U.S. Food and Drug Administration. Sodium in Your Diet (2,300 mg daily upper guidance). fda.gov