The crust browns 25 minutes before the center sets, so your eyes will betray you every time. Here’s the temperature, the crumb cue, and the 10-minute rest that separate a sliceable loaf from a gummy one.
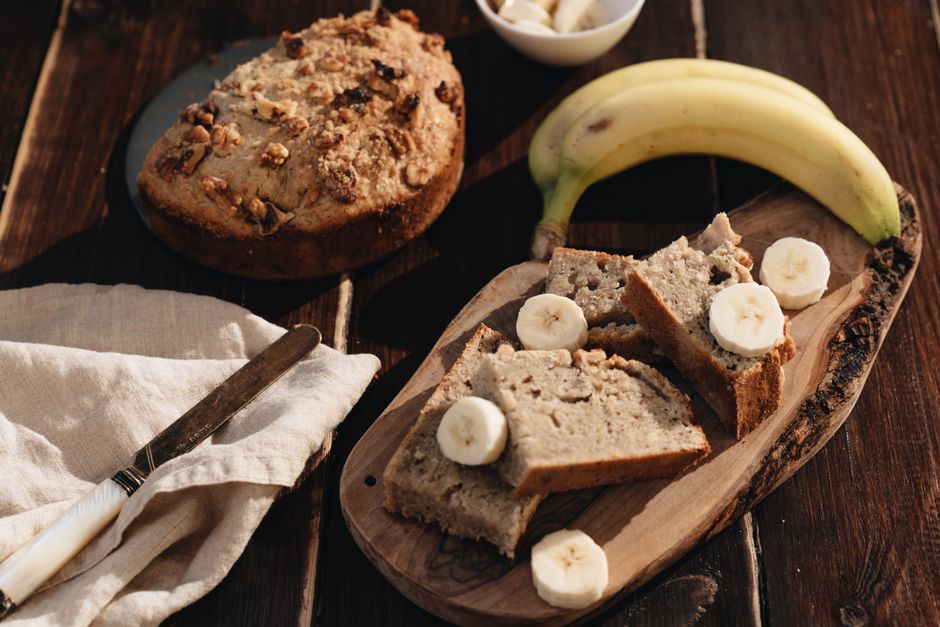
Pull banana bread when an instant-read thermometer plunged into the geometric center reads 200–205°F (93–96°C). A bamboo skewer inserted at the center and again 2 inches off-center should come out with a few moist crumbs clinging to it — never wet batter, never bone dry. The top should be deep golden and dome-set, the edges just beginning to pull from the pan. Then rest the loaf 10 minutes in the pan before turning it out; the center climbs another 5–8°F as it sits.
- Why Banana Bread Is the Hardest Loaf to Read
- The 5 Doneness Tests, Ranked Most to Least Reliable
- Three False Positives That Ruin Loaves
- Banana Bread Doneness Temperature Chart
- What Changes Your Bake Time
- The Pull-Early Protocol
- Equipment You Actually Need
- Troubleshooting: Gummy, Sunken, or Dry
- Storing, Freezing, and Rescuing a Loaf
- Banana Bread Doneness FAQ
Why Banana Bread Is the Hardest Loaf to Read
Banana bread lies to you. A loaf can look mahogany-dark and spectacularly domed at 50 minutes and still hide a raw, gummy tunnel running through its center. Two mechanisms cause this, and both are worth understanding before you pull the trigger.
First, sugar delays starch gelatinization. Overripe bananas bring a heavy load of glucose, fructose, and sucrose to the batter. Those sugars compete with starch granules for available water, which raises the temperature at which the granules swell, rupture, and set the crumb into a stable sponge. Harold McGee documents this effect directly: sugar and other solutes raise the gelatinization temperature of wheat starch, which is precisely why a high-sugar quick bread needs to reach 200–205°F at the center rather than the ~190°F you’d pull a lean artisan loaf at.[2]
Second, the crust runs on a completely separate clock. The surface of the loaf crosses 300°F within the first 25 minutes and starts building Maillard color immediately. Meanwhile the center is still crawling through 160°F. This is the core of the problem: every visual cue you have — color, dome, aroma — is a crust reading, and the crust is finished long before the crumb is.
There’s a safety dimension too. Banana bread contains eggs and raw flour, so the interior needs to pass well beyond 160°F, the safe minimum internal temperature for egg dishes.[1] A 200°F center clears that threshold comfortably — an underbaked, gummy loaf at 175°F does not.
The 5 Doneness Tests, Ranked Most to Least Reliable
Use them in this order. Each subsequent test confirms what the one before it told you, and no single test on its own is bulletproof.
“A thermometer answers the only question that matters: has the center finished setting? Everything else is commentary.”
— WorldDishly test kitchen standard for quick breads
Three False Positives That Ruin Loaves
1. Reading the crust as doneness. Banana breads with 1½ cups of mashed banana and a cup of sugar will hit deep golden brown at 45 minutes while the center is still at 180°F. If you pull on color alone, you get a beautifully baked shell around a raw core.
2. Probing the dome crack. The split down the center of the loaf is the thinnest, hottest section — it sets 10–15 minutes before the surrounding crumb. A skewer through the crack comes out clean while the batter 2 inches to either side is still liquid. Probe the crack, and probe beside it.
3. Trusting the recipe timer. A recipe’s “bake 60 minutes” assumes one specific pan, one specific oven calibration, and one specific banana-to-flour ratio. Your kitchen is not that kitchen. Timer is a starting point; temperature is the answer.
Banana Bread Doneness Temperature Chart
Different pan shapes and formulas land at slightly different targets. Use this as your lookup table — the internal temperature column is the one that governs everything else.
| Style / Pan | Target Center Temp | Typical Bake at 350°F | Resulting Crumb |
|---|---|---|---|
| Classic loaf, 9×5 light metal | 200–205°F (93–96°C) | 55–65 min | Moist but sliceable; clean knife after 1 hour |
| Extra-moist loaf, 8.5×4.5 | 200–205°F (93–96°C) | 60–70 min | Dense, fudgy, almost pudding-like center |
| Loaf with 1½ cups add-ins (nuts, chips) | 200–205°F (93–96°C) | 65–80 min | Studded crumb; add-ins slow heat transfer |
| Mini loaves, 5.75×3 | 200°F (93°C) | 30–40 min | Higher crust-to-crumb ratio; check at 28 min |
| Muffins | 200°F (93°C) | 18–22 min | Set throughout, no gummy base |
| Bundt or tube pan | 205–210°F (96–99°C) | 45–55 min | Even bake, no center depression |
| Glass or dark non-stick pan (oven at 325°F) | 200–205°F (93–96°C) | 60–75 min | Softer bottom crust, less edge darkening |
You’ll find recipes online that pull banana bread at 195°F for an “extra gooey” center. This works only if the loaf then rests a full 20–30 minutes in the pan, letting carryover heat push it to 200°F or above. Pull a 195°F loaf straight onto a rack and slice at 20 minutes, and you’ll cut into batter. If you want the fudgier texture, keep the loaf in the pan for 25 minutes and cover it loosely with a clean towel to trap the residual heat.
What Changes Your Bake Time
The 55–70 minute window is a range for a reason. Six variables reliably move it in one direction or the other.
Pan material and color
Light aluminum reflects radiant heat; dark non-stick and glass absorb it. A glass 9×5 loaf pan can push the bottom crust past 400°F and brown the sides 12–15 minutes before the center is done. When swapping into glass or dark metal, drop the oven to 325°F and add 10–15 minutes to the total time.
Pan size and batter depth
A standard 9×5-inch pan holds about 8 cups of batter; an 8×4-inch pan holds roughly 6. Same recipe, smaller pan, deeper batter column — add 10–15 minutes and expect a taller, more domed loaf.
Banana quantity and ripeness
Each medium banana contributes roughly ⅓ cup mashed fruit and about 3–4 tablespoons of water. Moving from 1 cup to 1½ cups of mashed banana can add 8–12 minutes and will visibly lower the final rise. Very ripe, black-spotted bananas carry more free sugar, which further raises the gelatinization threshold — the loaf needs more heat, not less.
Add-ins and their temperature
Frozen berries, cold chocolate chips, and chopped nuts all act as heat sinks. Frozen blueberries straight from the freezer can add 10 minutes and may leave cold pockets that read 10–15°F under the surrounding crumb. Toss chips and berries in a tablespoon of flour to suspend them, and bring add-ins to room temperature when you can.
Oven calibration
Consumer ovens routinely run 25°F off the dial in either direction. An inexpensive hanging oven thermometer will tell you in one bake whether your “350°F” is actually 375°F. If your loaf consistently burns at the edges before the center sets, this is almost always the cause.
Altitude
Above 3,000 feet, lower air pressure makes batters rise faster and dry out sooner. Cooperative extension guidance for high-altitude baking recommends reducing chemical leaveners slightly — about ⅛ teaspoon per teaspoon of baking soda — and raising the oven temperature by 15–25°F to set the structure before the loaf collapses.[5] Higher oven temperature also shortens bake time, so start checking at 45 minutes.
The Pull-Early Protocol
Pull at 200°F. Rest 10 minutes in the pan. Then turn out onto a wire rack. The pan’s residual heat keeps driving the center upward — typically 5–8°F in the first 10 minutes — while the crumb is still supported by the pan walls. Turn it out immediately and the soft center can sag; leave it 25 minutes and trapped steam softens the bottom crust into a soggy layer.
After the 10-minute pan rest, run a thin offset spatula or butter knife around the perimeter and invert onto a rack, then flip right-side up so the crust stays crisp. Cool a full 60 minutes before slicing. Cutting a hot loaf shears the starch network before it has finished retrograding, and the slices will tear and clump — which is usually mistaken for “underbaked” when the loaf was actually fine.
If you must serve it warm, give it 30 minutes minimum and cut with a serrated knife using a gentle sawing motion rather than downward pressure.
Equipment You Actually Need
None of this is expensive, and each item removes a specific source of guesswork.
Troubleshooting: Gummy, Sunken, or Dry
Diagnose by symptom. Each of these has a distinct cause, and most are fixable on the next bake.
Storing, Freezing, and Rescuing a Loaf
Cool the loaf completely — at least 2 hours — before wrapping. Warm bread traps steam inside the plastic, and you’ll get a soft, clammy crust by morning. Wrap tightly in plastic wrap, then in foil if you’re keeping it more than a day.
- Room temperature: 2 days, wrapped, in a cool spot away from the stove.
- Refrigerator: 3–4 days, tightly wrapped. Cold accelerates starch retrogradation, so refrigerated slices taste firmer — a 15-second microwave pulse or a quick toast restores them.
- Freezer: up to 3 months, sliced and separated with parchment, then wrapped in a freezer bag. Thaw individual slices at room temperature for 30 minutes or toast straight from frozen.
Per USDA FSIS refrigeration guidance, perishable baked goods containing eggs should be refrigerated within 2 hours of coming out of the oven if they won’t be eaten the same day, and cooked leftovers should be discarded after 3–4 days in the refrigerator.[4][6] Banana bread is a low-moisture, high-sugar product and is more shelf-stable than a custard, but the egg content still puts it in the refrigerate-if-keeping category.
Rescuing an underbaked loaf
If you sliced in and found a wet streak, don’t throw it out. Return the loaf — cut side down or wrapped back in its parchment — to a 325°F oven for 10–15 minutes, tented with foil. The interior will finish setting without further darkening the crust. If it’s already sliced and the slices are damp in the middle, toast them: a 350°F oven for 6–8 minutes firms the crumb and concentrates the banana flavor considerably.
Banana Bread Doneness FAQ
Can I rely on the toothpick test alone?
Only if you probe two spots — the exact center and a point 2 inches off-center. A single toothpick inserted anywhere else can pass through a fully set zone while the middle is still liquid. The toothpick is a good secondary check; the thermometer is the primary one.
My loaf reads 190°F but looks completely done. Should I pull it?
No. Carryover heat adds 5–8°F during the pan rest, so a 190°F loaf finishes around 196–198°F — below the threshold where the starch crumb is fully stable. You’ll get a slightly gummy center. Give it 6–10 more minutes and re-check.
How long should banana bread cool before I slice it?
Sixty minutes is the honest answer. Thirty minutes is the practical minimum if you’re serving it warm. Slicing sooner shears the still-setting starch network, and the crumb tears into clumps that look exactly like underbaking.
Why is my banana bread gummy at the bottom even when the center reads 200°F?
That’s usually a pan problem, not a batter problem. Glass and dark non-stick pans trap heat at the base, so the bottom sets hard while a layer just above it stays dense and wet. Try a light aluminum pan, or line the bottom with parchment and drop the oven to 325°F.
Do I need to refrigerate banana bread?
Not for the first 2 days — a wrapped loaf holds fine at room temperature and has better texture there. Beyond that, refrigerate it. Because the batter contains eggs, USDA guidance for perishable baked goods is to refrigerate within 2 hours if you’re not eating it the same day.[4]
Can I bake banana bread at 325°F instead of 350°F?
Yes, and it’s often the better choice for glass or dark pans. Lower the temperature by 25°F and add 10–15 minutes to the bake. The gentler heat gives the center more time to set before the crust over-colors. Target the same 200–205°F internal reading.
Should I tent the loaf with foil?
Only if the top has reached your preferred color while the center is still 15°F or more below target — typically around the 40-minute mark with a dark pan or a hot oven. Lay a sheet of foil loosely over the top; don’t crimp it to the pan edges, or you’ll trap steam and soften the crust.
How do I know when mini loaves or muffins are done?
Same target, shorter clock. Mini loaves in 5.75×3-inch pans reach 200°F in 30–40 minutes; start checking at 28. Muffins hit 200°F at 18–22 minutes. Their higher surface-to-volume ratio means they set fast — a two-minute overshoot will dry them out noticeably.
Does adding nuts or chocolate chips change the doneness point?
The target internal temperature stays the same at 200–205°F, but the time to reach it stretches by 8–15 minutes. Dense add-ins slow heat conduction through the middle. If you’re adding more than 1 cup total, plan on the long end of the bake range and tent with foil if the top browns early.
- Pull banana bread at an internal center temperature of 200–205°F (93–96°C) — not by color, and not by the timer.
- Probe two spots: the exact center and 2 inches off-center. The dome crack sets 10–15 minutes early and gives false readings.
- A perfect skewer comes out with a few moist crumbs, never wet batter and never bone dry.
- Rest the loaf 10 minutes in the pan before turning out; carryover heat adds 5–8°F and finishes the middle.
- Cool a full 60 minutes before slicing — cutting early mimics underbaking even in a perfectly baked loaf.
- Dark or glass pans need 325°F and 10–15 extra minutes; extra banana, cold add-ins, and high altitude all extend bake time.
- USDA FoodSafety.gov, “Safe Minimum Internal Temperature Chart” — egg dishes and mixtures containing eggs should reach 160°F.
- Harold McGee, On Food and Cooking: The Science and Lore of the Kitchen, revised edition (2004) — starch gelatinization, the effect of sugar on gelatinization temperature, and gluten setting ranges.
- King Arthur Baking Company, Banana Bread recipe and Baker’s Hotline guidance on quick-bread doneness and internal temperatures.
- USDA Food Safety and Inspection Service, “Refrigeration and Food Safety” — the two-hour rule for perishable foods.
- Colorado State University Extension, high-altitude baking adjustment guidance — leavener reduction and oven temperature increases above 3,000 feet.
- USDA Food Safety and Inspection Service, “Leftovers and Food Safety” — refrigerated cooked foods should be used within 3–4 days.