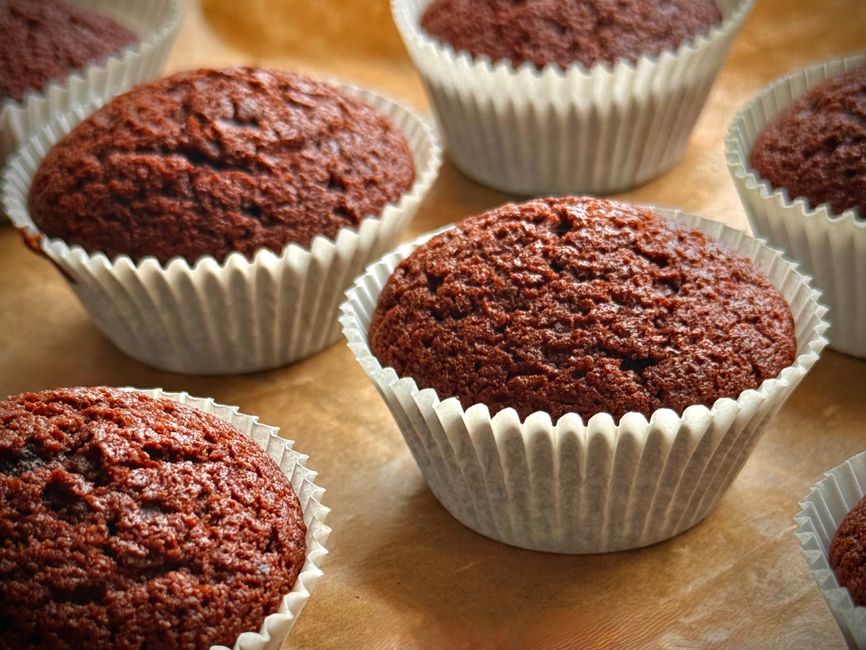
One bowl, nine ingredients, and a single 8×8 pan. This is the easy brownie recipe that delivers a glossy paper-thin crust over a dense, fudge-centered crumb — no stand mixer, no chocolate tempering, no guesswork.
Melt 115 g (½ cup) unsalted butter with 85 g (3 oz) chopped chocolate, stir in 60 g (½ cup) unsweetened cocoa while warm, then whisk into 2 eggs + 1 yolk beaten with 200 g (1 cup) sugar and 50 g (¼ cup) brown sugar for a full 2–3 minutes. Fold in 65 g (½ cup) all-purpose flour, ¾ tsp fine salt and 2 tsp vanilla. Bake in a parchment-lined 8×8 metal pan at 175°C / 350°F for 22–28 minutes, until the center reads 195–200°F (90–93°C). Cool completely — at least 90 minutes — before cutting.
- What an Easy Brownie Should Taste Like — and Where the Recipe Came From
- Ingredient Selection: The Nine Things That Matter
- Prep & Equipment Overview
- The Master Method, Step by Step
- Key Ratios, Temperatures & Timing
- Common Mistakes & Troubleshooting
- Serving, Pairing & Storage Notes
- Brownie Questions, Answered
What an Easy Brownie Should Taste Like — and Where the Recipe Came From
A proper brownie sits at the midpoint between cake and fudge, and it announces itself before you taste it. The top should be a whisper-thin, slightly glossy crust that shatters when a knife crosses it. Underneath: a moist, almost custardy interior with no dry crumb ring around the edge and no raw, gluey center. That texture is not a matter of luck. It comes from three levers — fat content, sugar-to-flour ratio, and how long you whip the eggs.
The brownie itself is a genuinely American invention, and its origin story is muddier than most dessert lore admits. The most repeated version credits the Palmer House Hotel in Chicago, which is said to have created a portable chocolate square for the 1893 World’s Columbian Exposition. Food historians treat that as legend rather than documented fact. What is documented is the printed recipe: brownies appear in late-19th-century American cookbooks, with Fannie Farmer’s 1896 Boston Cooking-School Cook Book among the earliest widely circulated versions — and those early brownies were made with far less chocolate than we use today, often leavened, often studded with nuts.[4]
The modern fudgy style — cocoa plus melted chocolate, minimal flour, no chemical leavening beyond what the eggs provide — is a 20th-century refinement. It is also the fastest version to make at home, which is why it forms the backbone of this easy brownie recipe. There is no creaming step, no mixer, and no chilling required before baking.
“The shiny, paper-thin top on a brownie is essentially a meringue: sugar that dissolved into the egg foam migrates to the surface during baking, dries out, and crystallizes into a glassy film.”
— Standard explanation of the brownie crust effect in professional baking literature[3]
That single sentence explains the most common failure in home brownie baking. If your brownies come out matte-topped and cakey, the problem is almost never the oven. It is sugar that never fully dissolved, or an egg mixture that was never whipped long enough to build the foam that carries it.
Ingredient Selection: The Nine Things That Matter
Everything below makes one 8×8-inch (20×20 cm) pan, cut into 16 squares. Weights are given first because a digital scale removes the single biggest variable in home baking: how much flour one person’s cup scoop happens to hold.
- Unsalted butter, 115 g (½ cup / 1 stick) — melted, not browned. Butter brings flavor; its water content also steams the batter slightly, keeping the crumb tender.
- Bittersweet or semisweet chocolate, 85 g (3 oz) — chopped bar or chips between 60% and 70% cacao. Bar chocolate melts more smoothly than chips, which contain stabilizers.
- Unsweetened cocoa powder, 60 g (½ cup) — natural or Dutch-process, see the comparison below.
- Granulated sugar, 200 g (1 cup) — the workhorse. Do not reduce it; sugar is structural here, not just sweetening.
- Light brown sugar, 50 g (¼ cup, packed) — adds moisture and a faint caramel note. Optional but recommended.
- Eggs, 2 large plus 1 yolk — room temperature. The extra yolk pushes the texture toward fudge.
- All-purpose flour, 65 g (½ cup) — sifted after measuring. This is intentionally a small amount.
- Fine sea salt, ¾ tsp — plus flaky salt for finishing.
- Vanilla extract, 2 tsp — and ½ tsp instant espresso powder if you have it. Espresso does not make brownies taste like coffee; it amplifies the cocoa.
Natural vs. Dutch-Process Cocoa
This is the one substitution in the recipe that changes the result rather than just the label. Both work. They do not behave identically.
Acidic (pH around 5–6). Lighter in color, sharper and more fruity in flavor, and slightly more soluble in batters containing baking soda. Expect a redder brownie with a brighter chocolate bite.
Alkalized (pH around 7–8). Darker, smoother, Oreo-like in color and mellow in flavor. It dissolves more easily in fat and gives the deepest, most bar-like appearance.[3]
Because this recipe contains no baking soda or baking powder, the acid–base chemistry is a non-issue. You can swap natural for Dutch-process one-for-one with total confidence. Choose Dutch-process for the darkest, most uniform crumb; choose natural for a fruitier, more old-fashioned chocolate flavor.
Butter vs. Oil — a Legitimate Fork in the Road
Neutral oil (grapeseed, canola, light olive) produces a shinier top and an even fudgier center because it stays liquid at room temperature. Butter produces better flavor. The compromise most pastry kitchens land on: use 85 g (6 tbsp) butter plus 2 tbsp neutral oil. It costs you nothing and improves both characteristics. Substitute the full 115 g of butter with ½ cup oil if you want a dairy-free version — the texture will be softer, and the brownies will need refrigeration to firm up.
Prep & Equipment Overview
Total active time is about 12 minutes. The rest is oven and cooling time. Get the pan lined and the oven fully preheated before you melt anything, because the batter comes together fast and does not like to sit.
Set the oven rack to the lower-middle position and preheat to 175°C / 350°F at least 20 minutes before baking. A fully saturated oven recovers heat quickly when the door closes; a rushed oven produces a domed, uneven slab. Also pull the eggs out 30 minutes ahead — cold eggs whip into a weaker foam.
The Master Method, Step by Step
Eight steps, one bowl for the wet ingredients, one small bowl for melting. Read through once before starting; the tempo matters more than any single technique.
Pull the pan at 22 minutes and check. If it is not ready, add 2 minutes at a time, never 5. Brownies go from perfectly fudgy to dry and crumbly in roughly a 4-minute window. Judges at baking competitions call this the “cliff,” and it is steeper in an 8×8 pan than in a 9×13, because the batter depth is greater and the center lags further behind the edges.
Key Ratios, Temperatures & Timing
These numbers are the difference between repeating this recipe successfully and getting a different result every time. Write them on the inside of a cabinet door.
| Variable | Target | Why It Matters |
|---|---|---|
| Pan size | 8×8 in / 20×20 cm | Batter depth of roughly 1 inch. A 9×13 pan spreads the same batter too thin and bakes in 18–20 minutes. |
| Pan material | Light metal | Dark nonstick over-browns edges by 10–15°F; glass bakes 5–10 minutes slower. |
| Oven temperature | 175°C / 350°F | Conventional. Reduce to 160°C / 325°F if using a dark pan or convection setting. |
| Bake time | 22–28 minutes | Start checking at 22. Rotate the pan at 18 minutes if your oven has hot spots. |
| Internal temperature | 195–200°F (90–93°C) | Fudgy at 195°F, cakey at 210°F. This is the single most reliable doneness signal. |
| Egg whip time | 2–3 minutes | Builds the foam that produces the crackly top. |
| Cocoa : chocolate | 60 g : 85 g | Balances deep cocoa flavor against chocolate richness. |
| Cool time before cutting | 90–120 minutes | Structure sets as the slab cools; early cutting tears the crumb. |
| Yield | 16 squares (2×2 in) | Or 9 larger squares if you are not sharing. |
Adjusting for Texture
The recipe as written is squarely fudgy. If you want to shift it along the spectrum, change only one variable at a time and keep everything else fixed.
- Cakier: Increase flour to 90 g (¾ cup) and add ½ tsp baking powder. Bake 25–30 minutes.
- Fudgier: Reduce flour to 50 g (scant ½ cup) and add one more egg yolk. Bake 20–24 minutes.
- Less sweet: Reduce granulated sugar to 170 g (¾ cup + 1 tbsp) and use a 70% cacao chocolate. Do not go below 150 g of total sugar — the crust and structure depend on it.
Common Mistakes & Troubleshooting
Nearly every brownie problem traces back to one of seven causes. Match your symptom to the fix.
Raw flour is not a ready-to-eat ingredient. It is a raw agricultural product that can carry E. coli and Salmonella, and the FDA explicitly advises against eating raw dough, batter, or flour straight from the bag — this applies to the batter in this recipe even though the eggs are pasteurized-shell.[1] Once baked to a 195°F center, both the egg and the flour reach a safe internal temperature, well above the 160°F threshold for egg safety.[2] If you want to eat the batter raw, heat-treat the flour first: spread it on a sheet pan and bake at 350°F for 5 minutes, then cool completely.
Serving, Pairing & Storage Notes
A fudgy brownie is a rich, low-acid dessert, and it drinks and eats best against something that cuts the fat or echoes the cocoa’s bitterness.
Serving
- Flaky sea salt on the warm surface, applied within 5 minutes of leaving the oven so it adheres.
- Vanilla ice cream — the classic contrast. Let the square sit 20 seconds in the microwave first.
- Cold brew or espresso. The roast bitterness mirrors the cocoa.
- Ruby port or a tawny 10-year. Sweet fortified wines and dark chocolate share the same roasted, dried-fruit notes.
- Raspberry coulis. Bright acidity against a very dense, sweet crumb.
Storage
| Method | Duration | How |
|---|---|---|
| Room temperature | 3–4 days | Airtight container, single layer with parchment between any stacked layers.[5] |
| Refrigerator | Up to 1 week | Wrap the slab tightly in plastic, then foil. Cold brownies are firmer and slice beautifully. |
| Freezer | Up to 3 months | Freeze individual squares on a tray, then bag. Thaw at room temperature for 30 minutes. |
Avoid refrigerating brownies for longer than a week: cold temperatures accelerate starch retrogradation, which is the technical term for the stale, dry texture you taste in day-old refrigerated baked goods. If your brownies do firm up in the fridge, 10 seconds in the microwave restores the fudge texture almost completely.
Brownie Questions, Answered
The questions readers send most often about this easy brownie recipe, answered in order of how frequently they come up.
Why didn’t my brownies get a crackly top?
Ninety percent of the time it is the egg-and-sugar whisk. Sugar must fully dissolve into the egg foam, and that takes a genuine 2–3 minutes of vigorous whisking by hand. If you can still feel grit between your fingertips, keep going. A secondary cause is a humid kitchen, which prevents the surface film from drying and setting. Running a dehumidifier or simply baking on a dry day solves it.
Can I use oil instead of butter?
Yes. Replace the 115 g of butter with 110 g (½ cup) of neutral oil. Oil brownies have a glossier top and a distinctly fudgier, more tender crumb, but they lose the brown-butter-adjacent flavor that butter contributes. The halfway approach — 85 g butter plus 2 tbsp oil — is the best of both.
How do I know when brownies are done without a thermometer?
Three signals together: the surface looks set and matte-to-slightly-glossy with a crackle beginning to form; the pan no longer jiggles as a liquid when nudged; and a toothpick inserted 1 inch from the center comes out with moist, clumpy crumbs. A clean toothpick means overbaked. Purchase an inexpensive instant-read thermometer if you bake often — 195–200°F takes all the ambiguity out of it.
Can I double the recipe?
Yes, but use a 9×13-inch pan rather than two 8×8 pans unless you want to manage two racks. Bake at 350°F for 32–38 minutes and check the center at 32 minutes. The internal temperature target stays 195–200°F regardless of batch size — that is the advantage of temperature-based doneness.
What if I only have cocoa powder and no chocolate bar?
Increase the cocoa to 85 g (¾ cup) and add 2 extra tablespoons of butter or oil to compensate for the missing cocoa butter. The brownies will be slightly drier and more intensely chocolatey, closer to a classic lunchroom brownie than a fudge bar. Add 1 tablespoon of milk or brewed coffee to the wet ingredients to restore moisture.
Can I make these gluten-free?
Yes. Substitute an equal weight (65 g) of a 1:1 gluten-free blend that already contains xanthan gum. Because the flour quantity is so small, the difference is nearly imperceptible. Do not substitute almond flour one-for-one — it has no starch structure and will produce a greasy, collapsing slab unless you also add 2 tablespoons of cornstarch or a binder.
Is it safe to eat the raw batter?
No, not as written. Raw flour can carry E. coli, and raw shell eggs can carry Salmonella. The FDA advises against consuming raw dough or batter of any kind.[1] You can make it safe by heat-treating the flour (5 minutes at 350°F, spread thin, cooled completely) and using pasteurized-in-shell eggs.
Glass pan or metal pan?
Metal is the better choice and the one this recipe is calibrated for. Glass heats slowly and holds heat, so the outside edges set before the center catches up, giving you dry edges and an underdone middle. If glass is all you have, drop the oven to 325°F and add 5–8 minutes, checking from 26 minutes onward.
- Melted butter plus chopped chocolate, cocoa bloomed into the warm fat — no mixer, no creaming, one bowl for the wet ingredients.
- Whisk eggs, sugars, salt and vanilla for a full 2–3 minutes. Under-whisking is the number one cause of a matte, crustless top.
- Use 65 g (½ cup) of flour for an 8×8 pan. The 2:1 sugar-to-flour ratio is what makes the crumb fudgy rather than cakey.
- Bake at 175°C / 350°F for 22–28 minutes, pulling the pan at an internal center temperature of 195–200°F (90–93°C).
- Cool at least 90 minutes before cutting — the slab sets as it cools, not in the oven.
- Store airtight at room temperature for 3–4 days, refrigerate for up to a week, or freeze individual squares for up to 3 months.
- U.S. Food and Drug Administration, “Raw Dough’s a Raw Deal — Play It Safe With Eggs and Flour.” fda.gov
- USDA Food Safety and Inspection Service, “Safe Minimum Internal Temperature Chart” and egg safety guidance. fsis.usda.gov
- King Arthur Baking Company, “Cocoa Powder: Dutch-Process vs. Natural” and baking science resources on cocoa butter and sugar crystallization. kingarthurbaking.com
- Fannie Merritt Farmer, The Boston Cooking-School Cook Book (1896), early printed brownie recipes; see also food-history documentation of the 1893 World’s Columbian Exposition brownie legend.
- USDA Food Safety and Inspection Service, “Refrigeration and Food Safety” — recommended storage times for baked goods and leftovers. fsis.usda.gov